東海屈指のプラネタリウム!「大台ヶ原」で撮る天の川
掲載日:2021.06.02
東海屈指の星空を見ることができる「大台ヶ原」で天の川を最も美しく撮る方法をご紹介。これを見ればあなたもすぐに最高の写真が撮れる⁈
三重県の若手風景写真家が教える、大台ヶ原で天の川を撮る為に知っておくべき情報を全公開!
こんにちは、Koshi Iguchiです。
今回は東海屈指の星空を見ることができる「大台ヶ原」について紹介していきたいと思います。
いきなりですが、「大台ヶ原って奈良じゃないの?」と思った方も多いと思います。
いいえ、「三重です。」
厳密にいうと、東大台の山頂付近が三重になります!
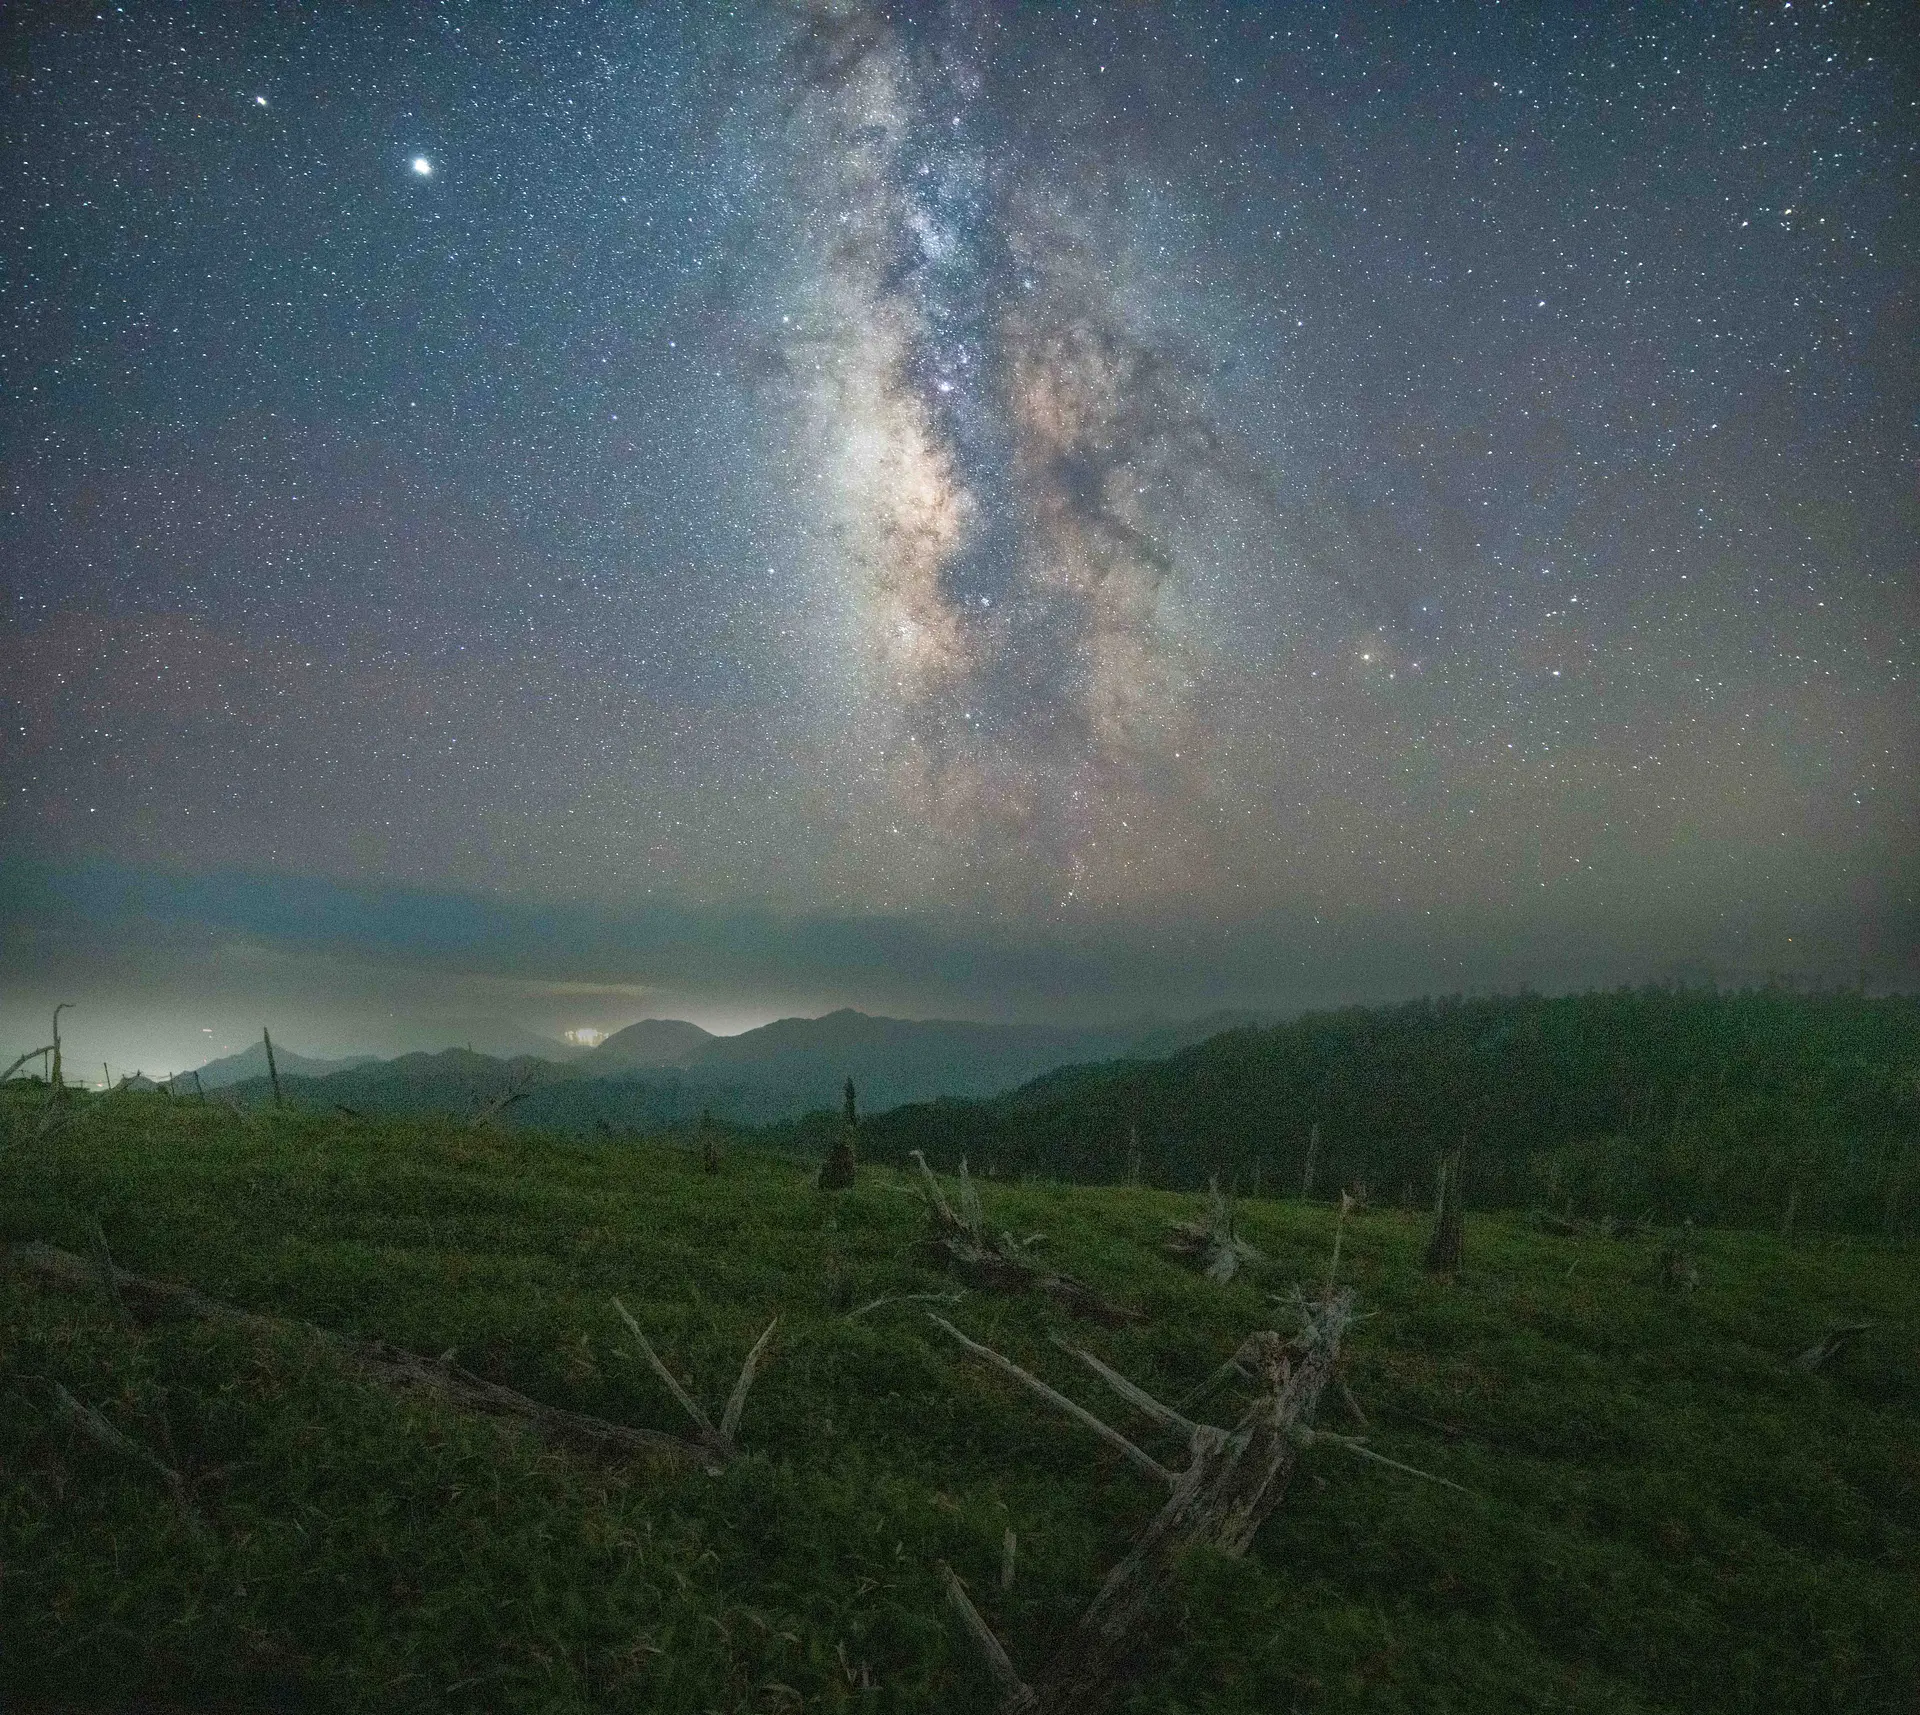
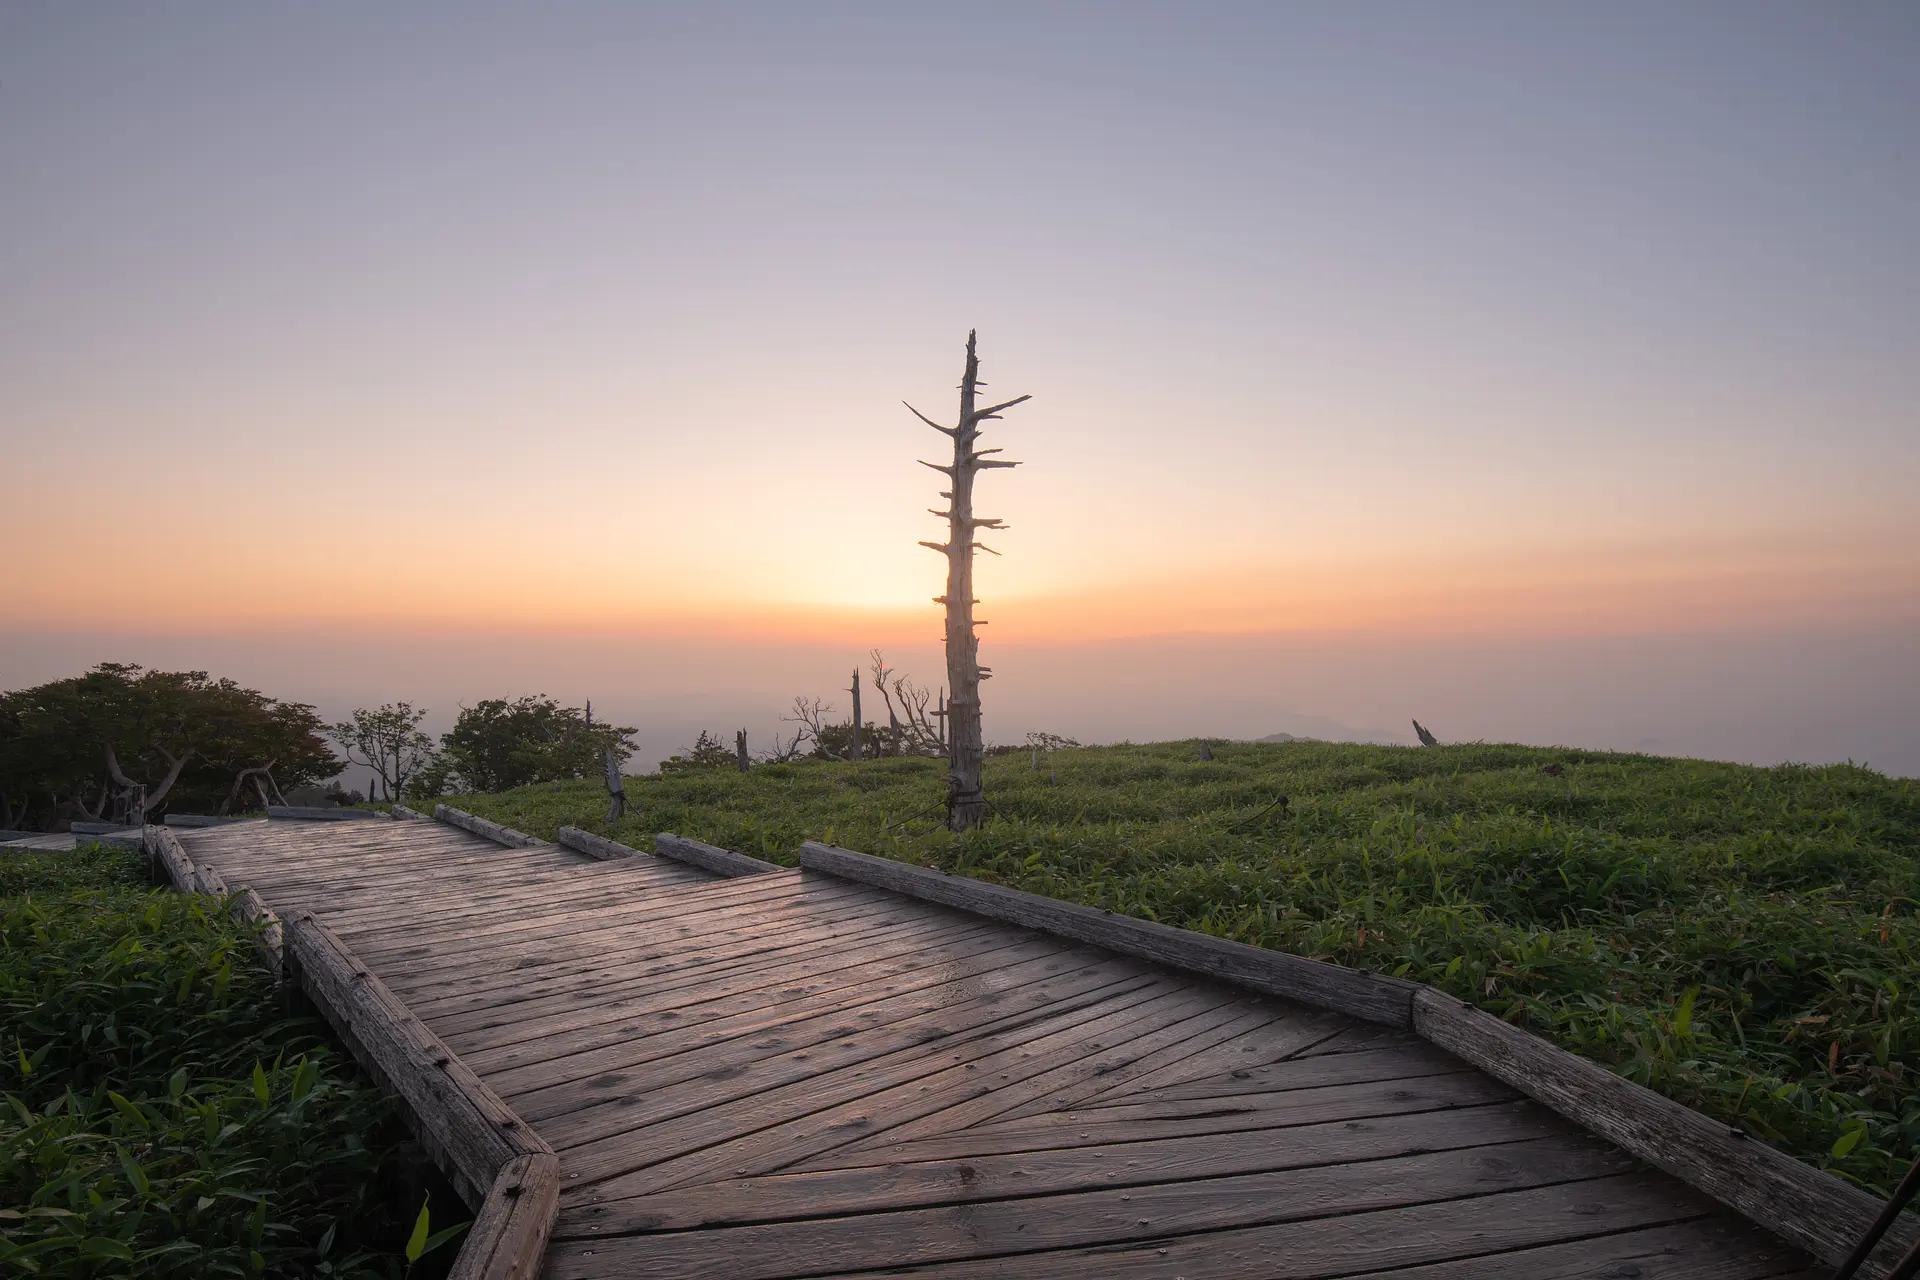
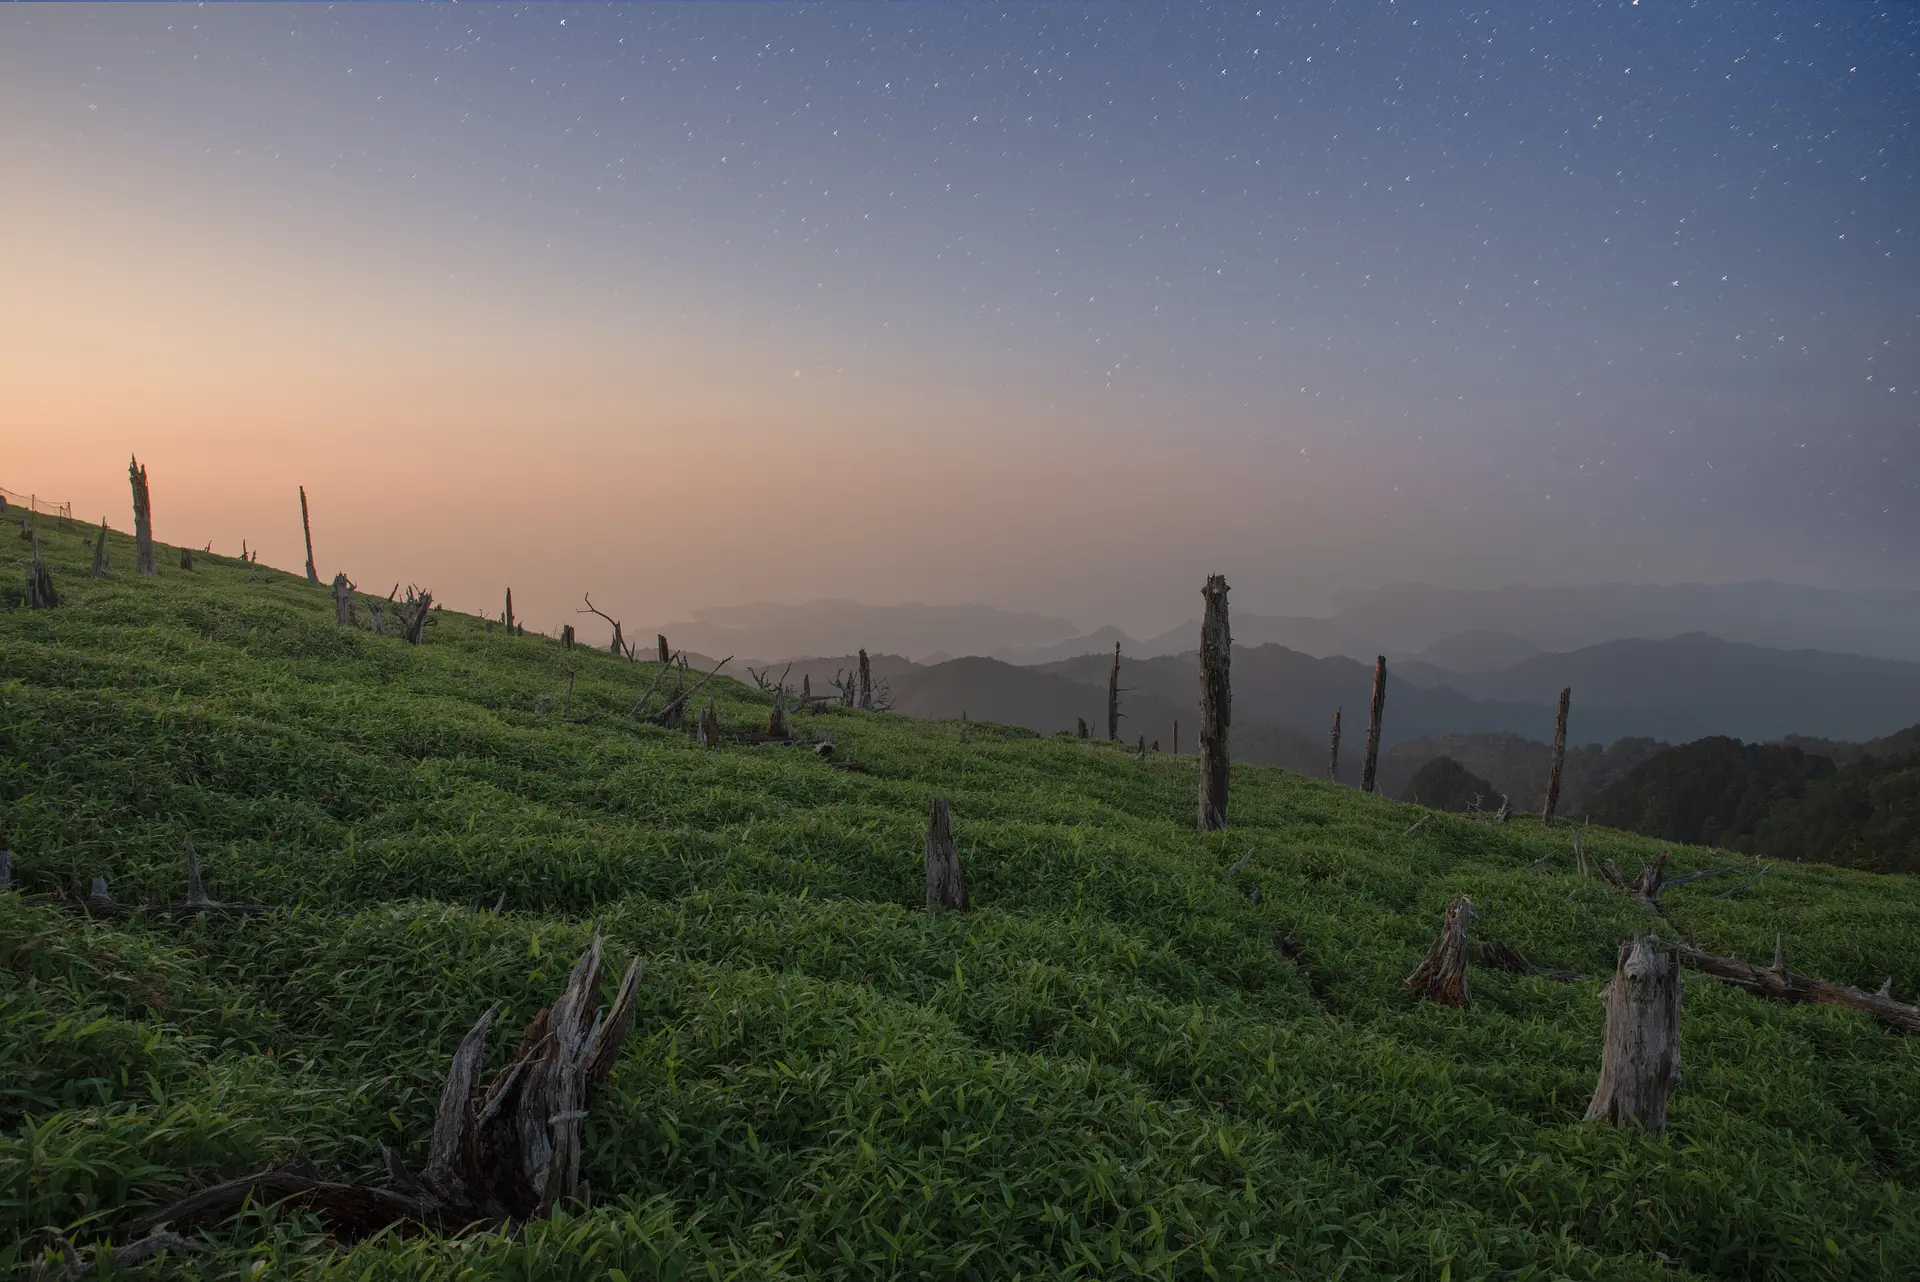
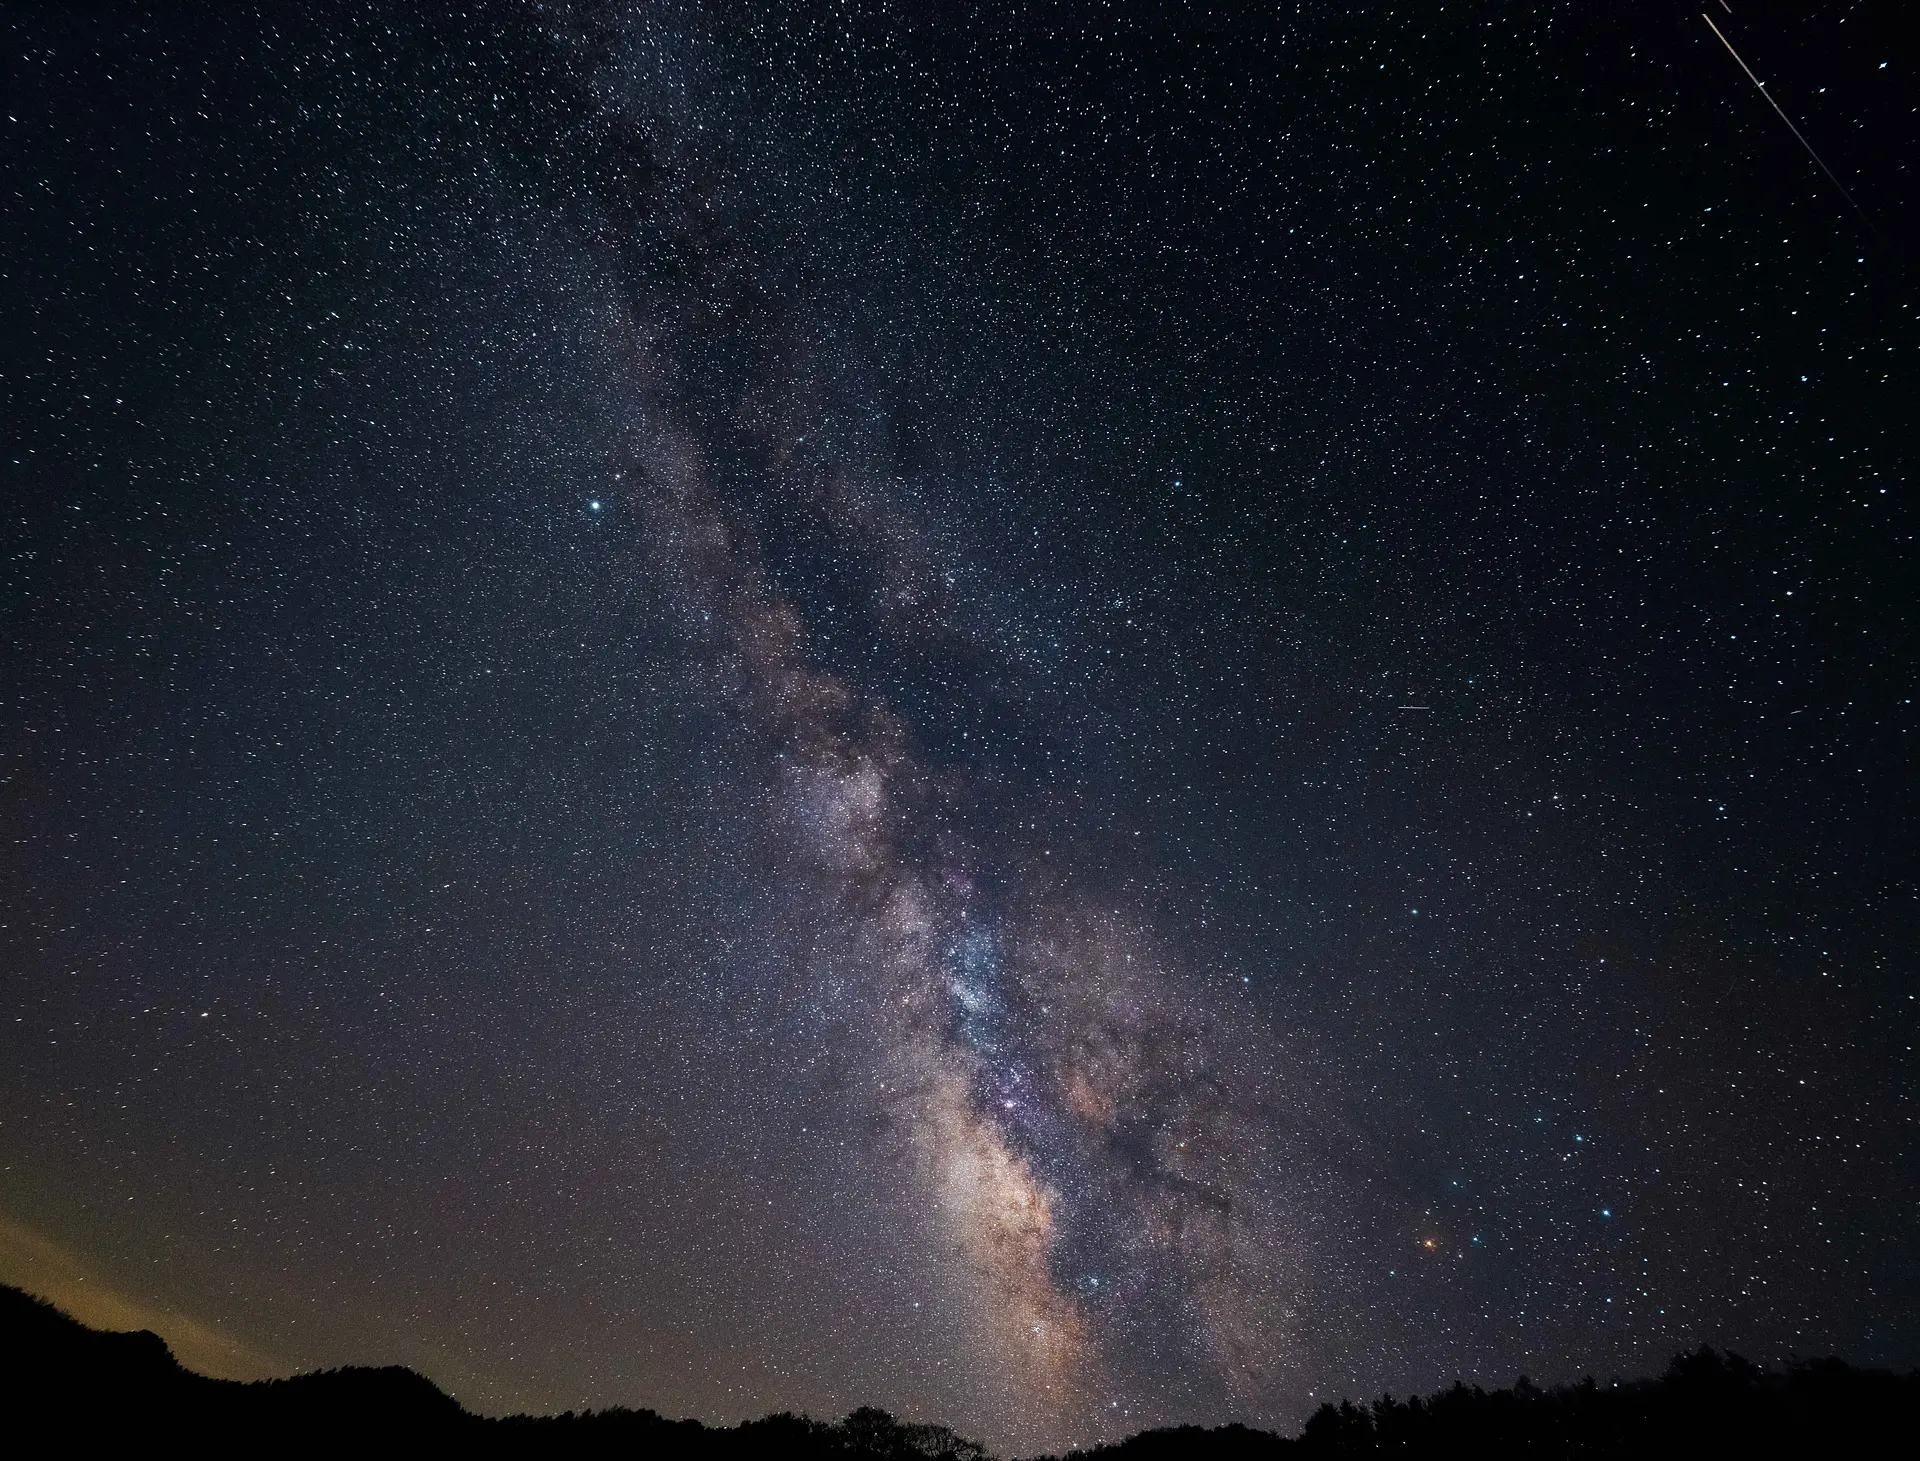
大台ヶ原の最高峰である日出ヶ岳、そして大台ヶ原で天の川と共に撮られている枯立の木や木道、展望台、、、実はそれ、ぜんぶ三重なんです!
・大台ヶ原とは
三重県大台町と奈良県吉野郡の県境に位置する山で、関西地方で最も星が綺麗に見えるスポットとして名高い、星の聖地です!
大台ヶ原のホームページはこちら↓
大台ヶ原ビジターセンター
夏場でも非常に寒く、風が強ければ半袖では寒くて耐えられない日もあると思いますので、しっかりと防寒着は持っていきましょう。
※注意
大台ヶ原の天の川撮影ポイントは登山コースになります。初心者コースではありますが、星目的でのナイトハイクは危険も伴います。1度日中の山行を行い、コースを把握した上での入山をお願いいたします。
・場所、アクセス
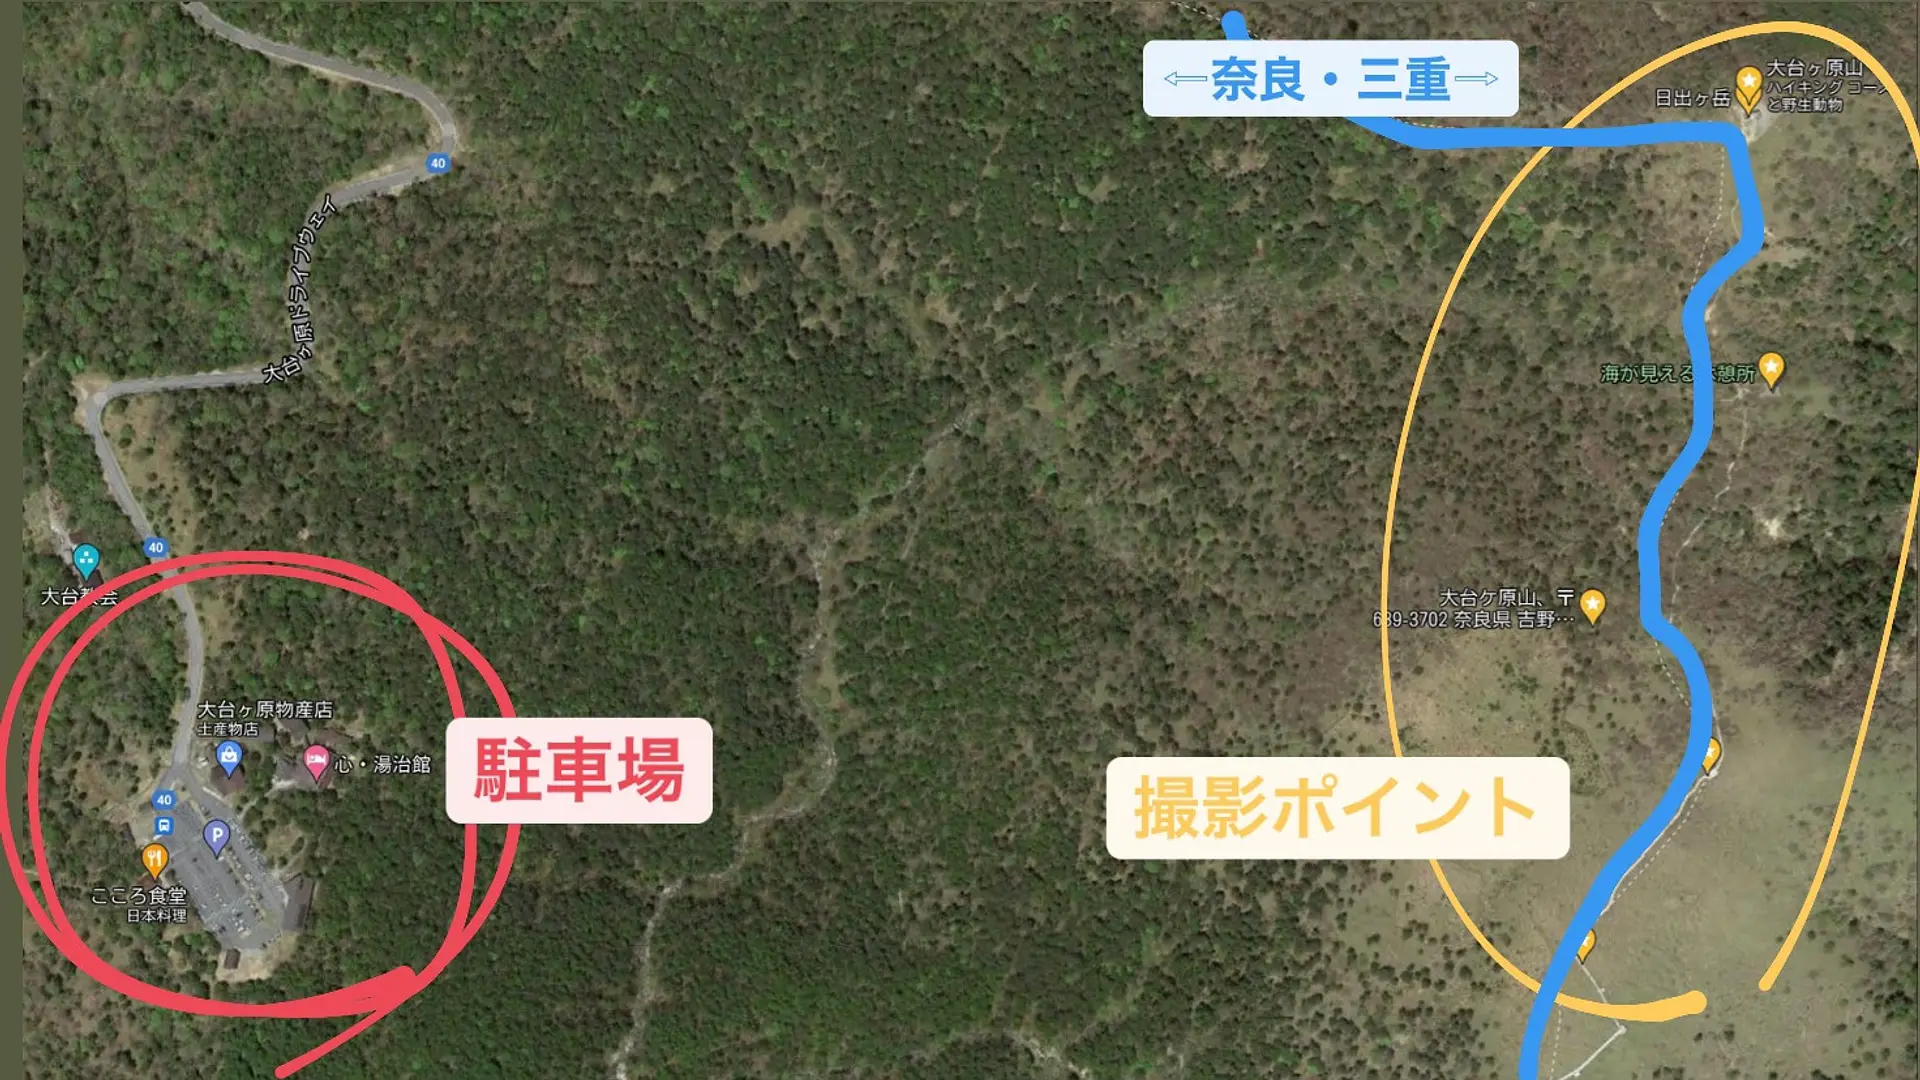
まず、駐車場、登山口となる大台ヶ原ビジターセンターを目指します。
ビジターセンターは奈良県にあり、三重県から向かうと大回りをして奈良県を通って行くこととなります。
詳しくはGoogleMap等の地図アプリでご確認ください。
大台ヶ原ビジターセンターの場所はこちら
駐車場はかなりの広く、駐車スペースがなくなるなんてことはまず無いかと。大台ヶ原のマップの看板も設置されておりますが、しっかりと事前に把握してから向かいましょう。
トイレも完備されており、日中は売店や食事処も営業しております。
・撮影時期、方角
天の川(星)の撮影可能なシーズンは2月〜10月ですが、大台ヶ原で天の川が撮影できるのは冬季通行止めの影響もあり、4月〜10月となっています。
また天の川を撮影に行く前に最も気を付けなければいけないことが月齢です。
月明かりの影響が少ない新月期を狙っていきましょう。
今が新月かどうかについては調べたらすぐに分かりますが、以下に2021年の新月の時期をまとめておくので、よかったら参考にしてください!
2021年6月 :6/6~6/16
2021年7月 :7/5~7/14
2021年8月 :8/4~8/12
2021年9月 :9/3~9/11
2021年10月 :10/3~10/10
上に新月期を記載しましたが、月齢を簡単に知ることができるアプリも出ているので、ぜひこちらも使ってみてください。
これを使えば一目で月毎の新月期を確認することができます。
もちろん大台ヶ原は目視でもちゃんと天の川を見ることができます!
ここまで月齢カレンダー、星座表と天の川の撮影をサポートしてくれるアプリを紹介しましたが、太陽の日の出、日の入り、月の出、月の入り、天の川の場所、方角、上がってくる時間などをGoogleストリートビューと連携させ、バーチャルに把握することができる、カメラマンに嬉しい最強なアプリもあるんです。
それが「サン・サーベイヤー(Sun Surveyor)」です!
このアプリは天の川撮影の最強の相棒です。もちろん天の川だけでなく、普段の風景撮影においても大活躍してくれます。
iOS版で1220円とアプリとしては少しお高い部類に入ると思いますが、お値段以上の活躍をしてくれることは間違いないので、風景を本格的に撮っている、もしくはこれから撮っていきたいという方は是非手に入れておきましょう。
サン・サーベイヤー:for iOS
サン・サーベイヤー:for Android
※アプリの紹介をしましたが、ステマ等ではありません。自身が使っており、とても重宝しているので紹介しています。
・撮影準備
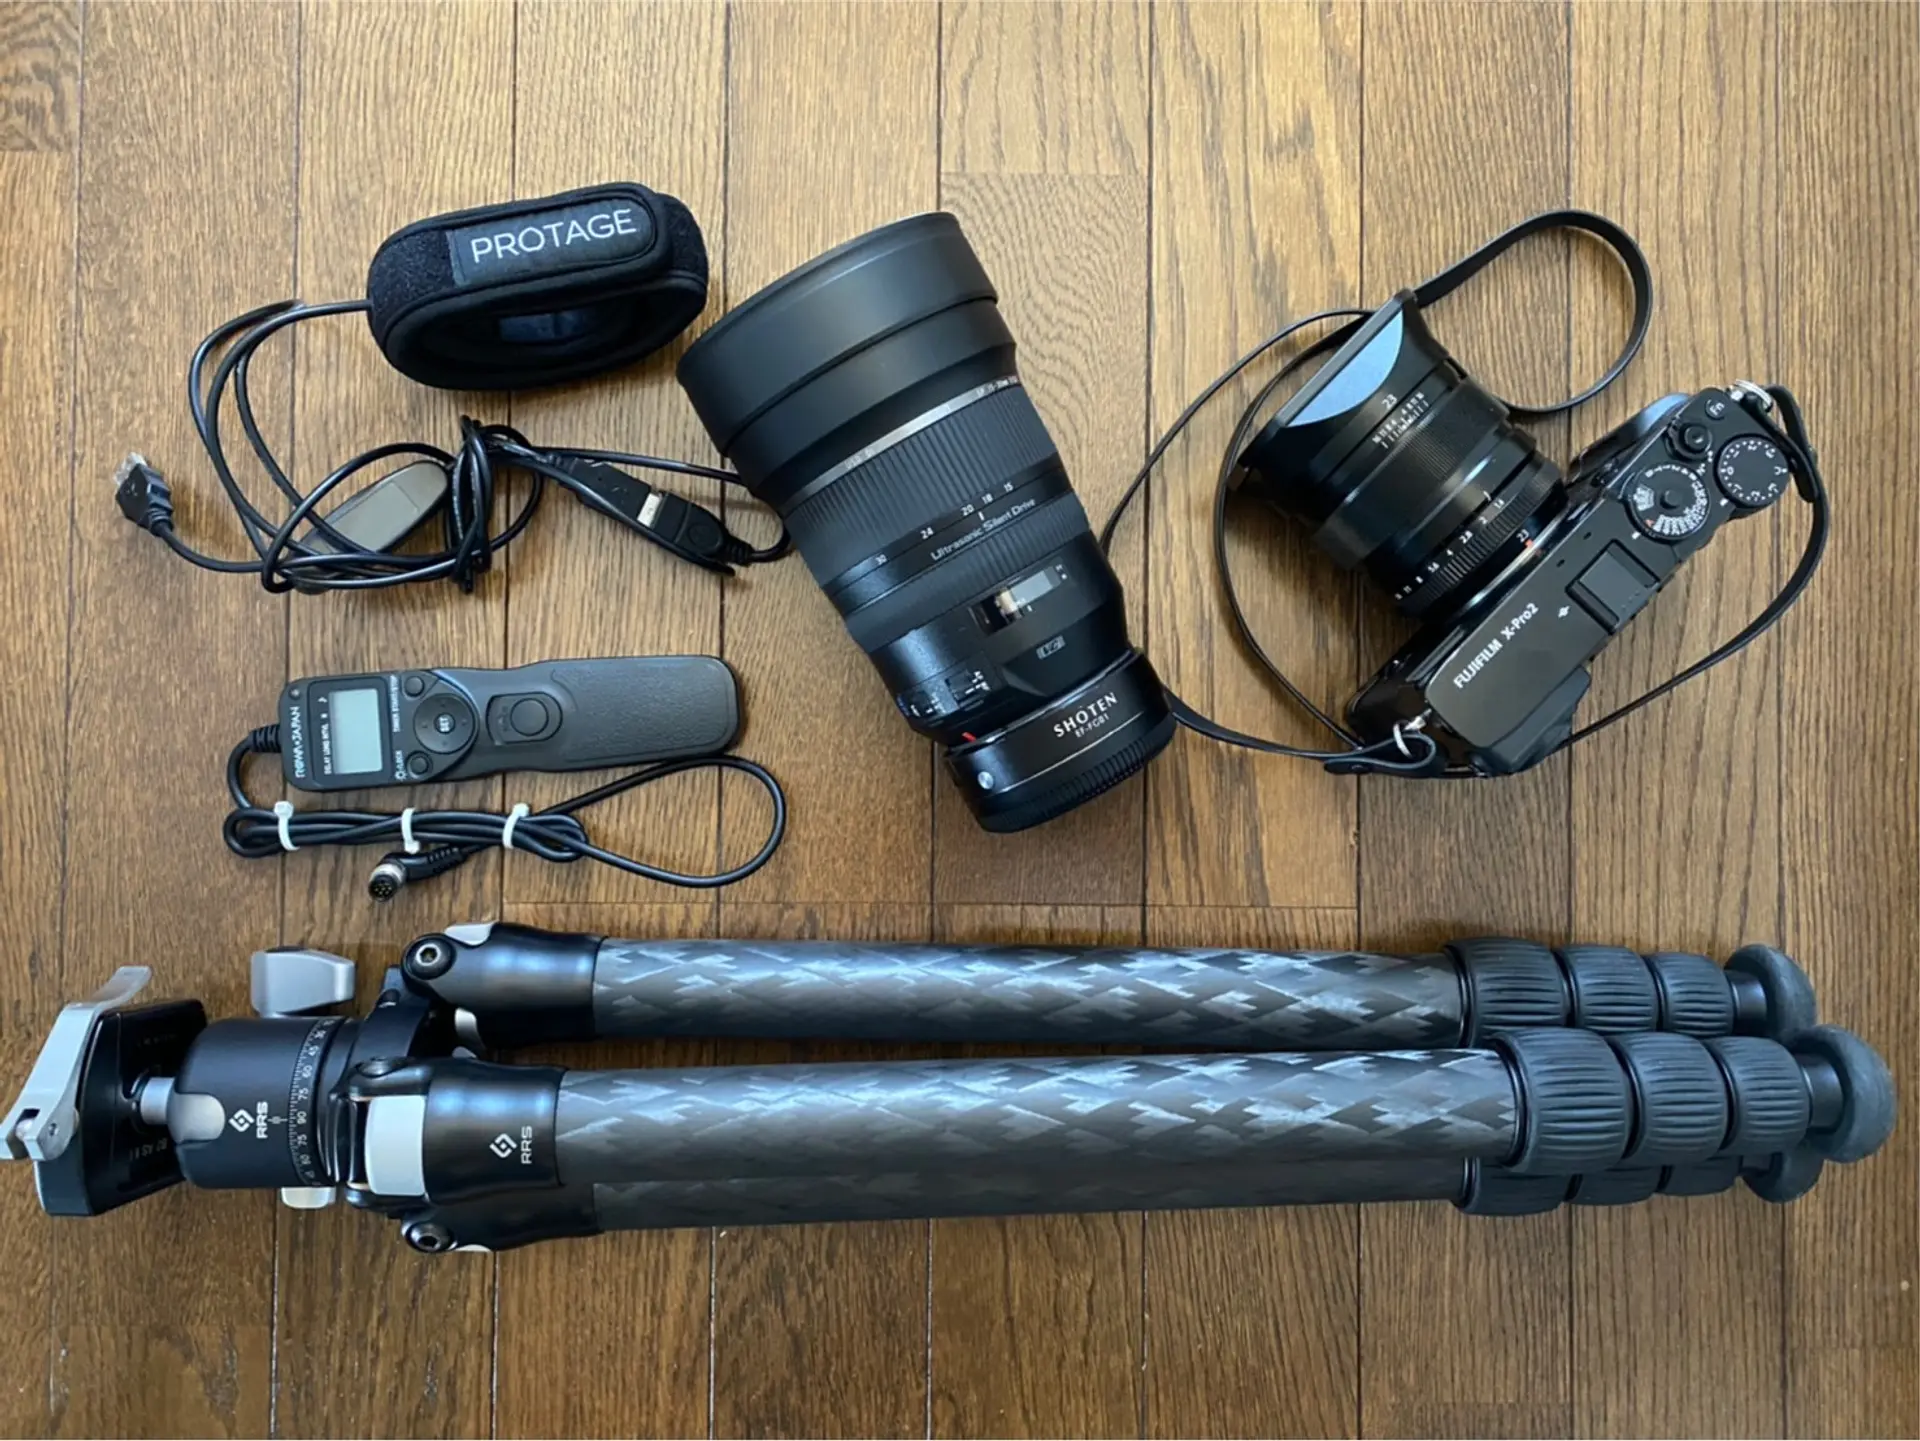
【レンズについて】
まず大前提に解放F値が小さいレンズが必要になります!
俗に言う明るいレンズですね。
本格的に天の川を撮影しようとするとF2.8以下に設定できるレンズが理想です。
勿論F3.5やF4のキットレンズでも撮影は可能なので、まずは挑戦してみましょう。
またレンズの焦点距離として24mm(フルサイズ換算)より広角なレンズが好ましいです。
例えば「NIKKOR Z 14-24mm f/2.8 S」のようなレンズですね。
このレンズは30万円ほどしますが、もっと手頃な値段で星を撮影できるレンズはたくさんあるので、「自分のカメラにおすすめの星撮影レンズを教えて欲しい!」と言う方は、私のInstagramへDMで連絡をいただければ、それぞれにおすすめを提案させていただきます。お気軽にご連絡ください。
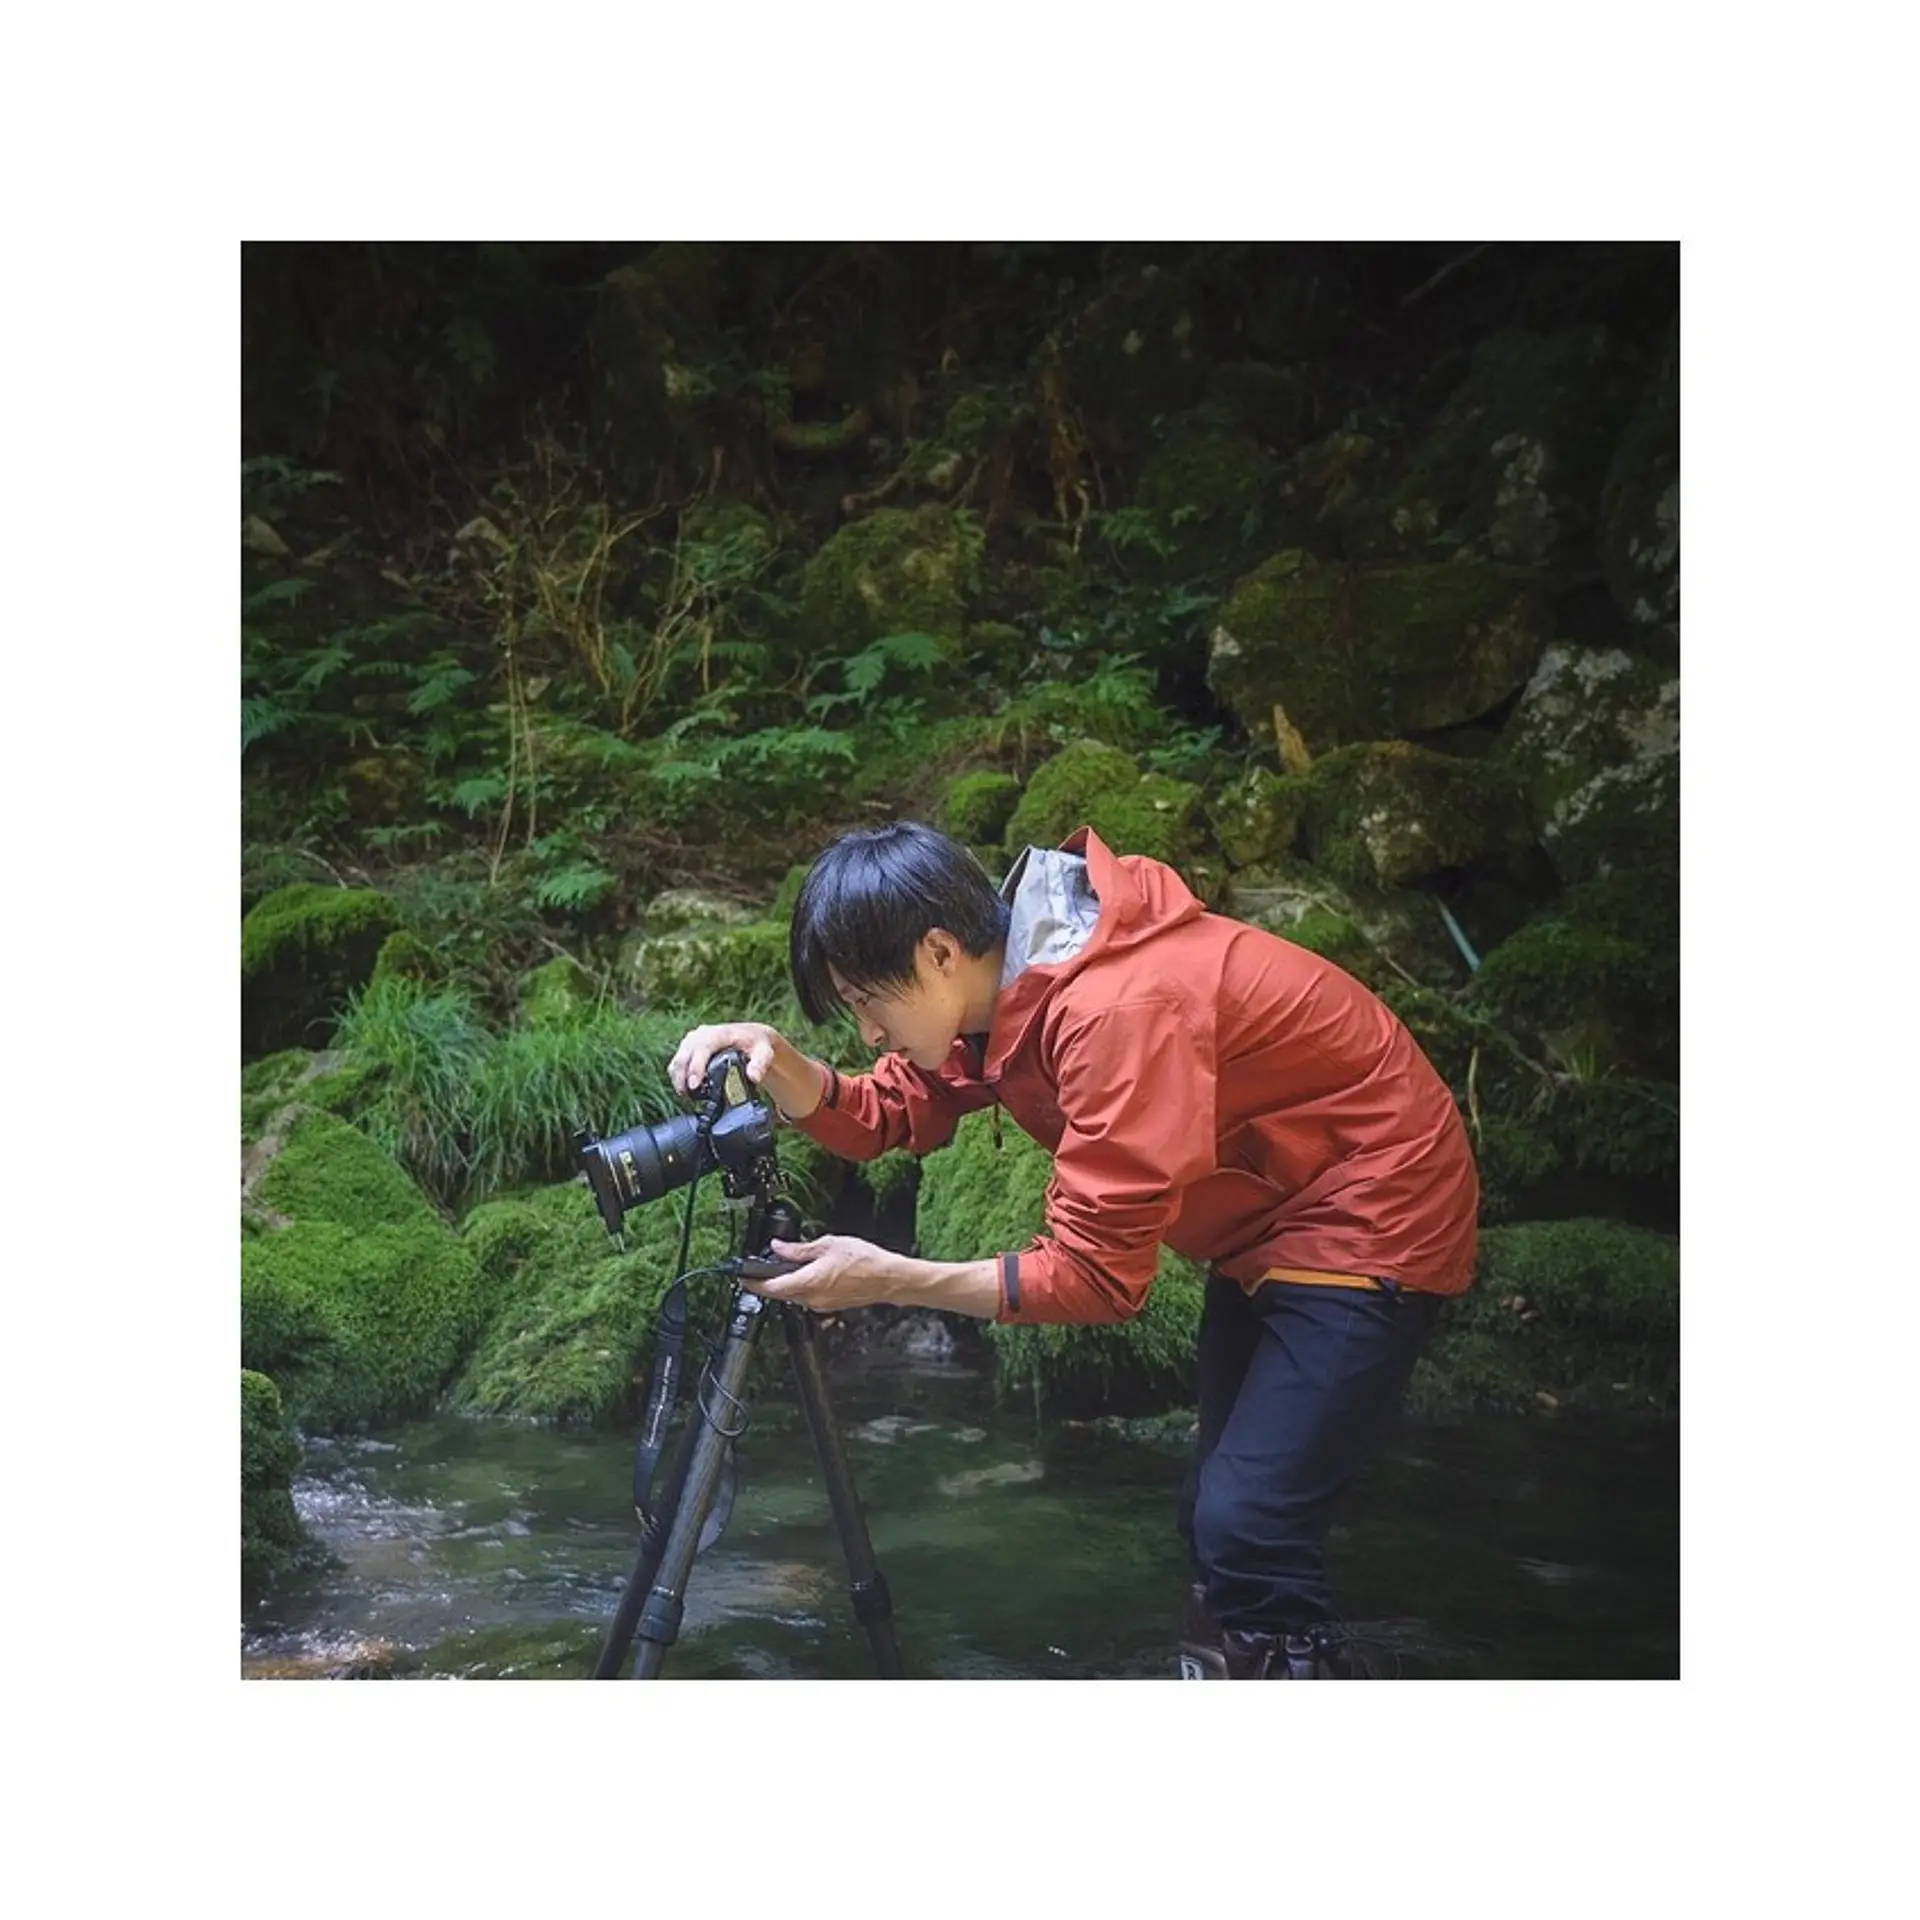
【三脚について】
次に、星撮影に欠かせないものといえば三脚ですね。
三脚なしに綺麗な星は絶対に撮れません。Amazonなどで売れられている1万円程度の三脚でも十分なので、手に入れておきましょう。
正直、明るいレンズと三脚さえあれば星は撮れます。
これ以下は、あれば撮影が楽になるようなものを紹介していきます。
【レリーズについて】
必須アイテムでは無いですが、ある方が確実に撮影が楽になります。
また微ブレの低減にも繋がります。
【レンズヒーターについて】
こちらはレリーズ以上にあったらいいな程度のアイテムです。
湿度が高いときや気温が低いときに星の撮影をしようとするとレンズが結露して、曇ってしまうことがあります。それを防止するためのアイテムです。
結露してしまうと、星がぼやけて写ったり、レンズのカビなどにも繋がってしまうので、あると安心です。
・撮影方法
前置きが長くなってしまいましたが、撮影方法のご紹介です。
天の川の撮影方法は調べたらたくさん出てきますし、もう既に知っている人もたくさんいると思いますが、せっかくなので読んでいってください。
【焦点距離について】
まず、焦点距離から決めていきましょう。
それぞれ好みに合わせて決めるのが1番ではありますが、大台ヶ原で枯立の木を前景に撮影する場合は24mm以下に設定しましょう。
【撮影モードについて】
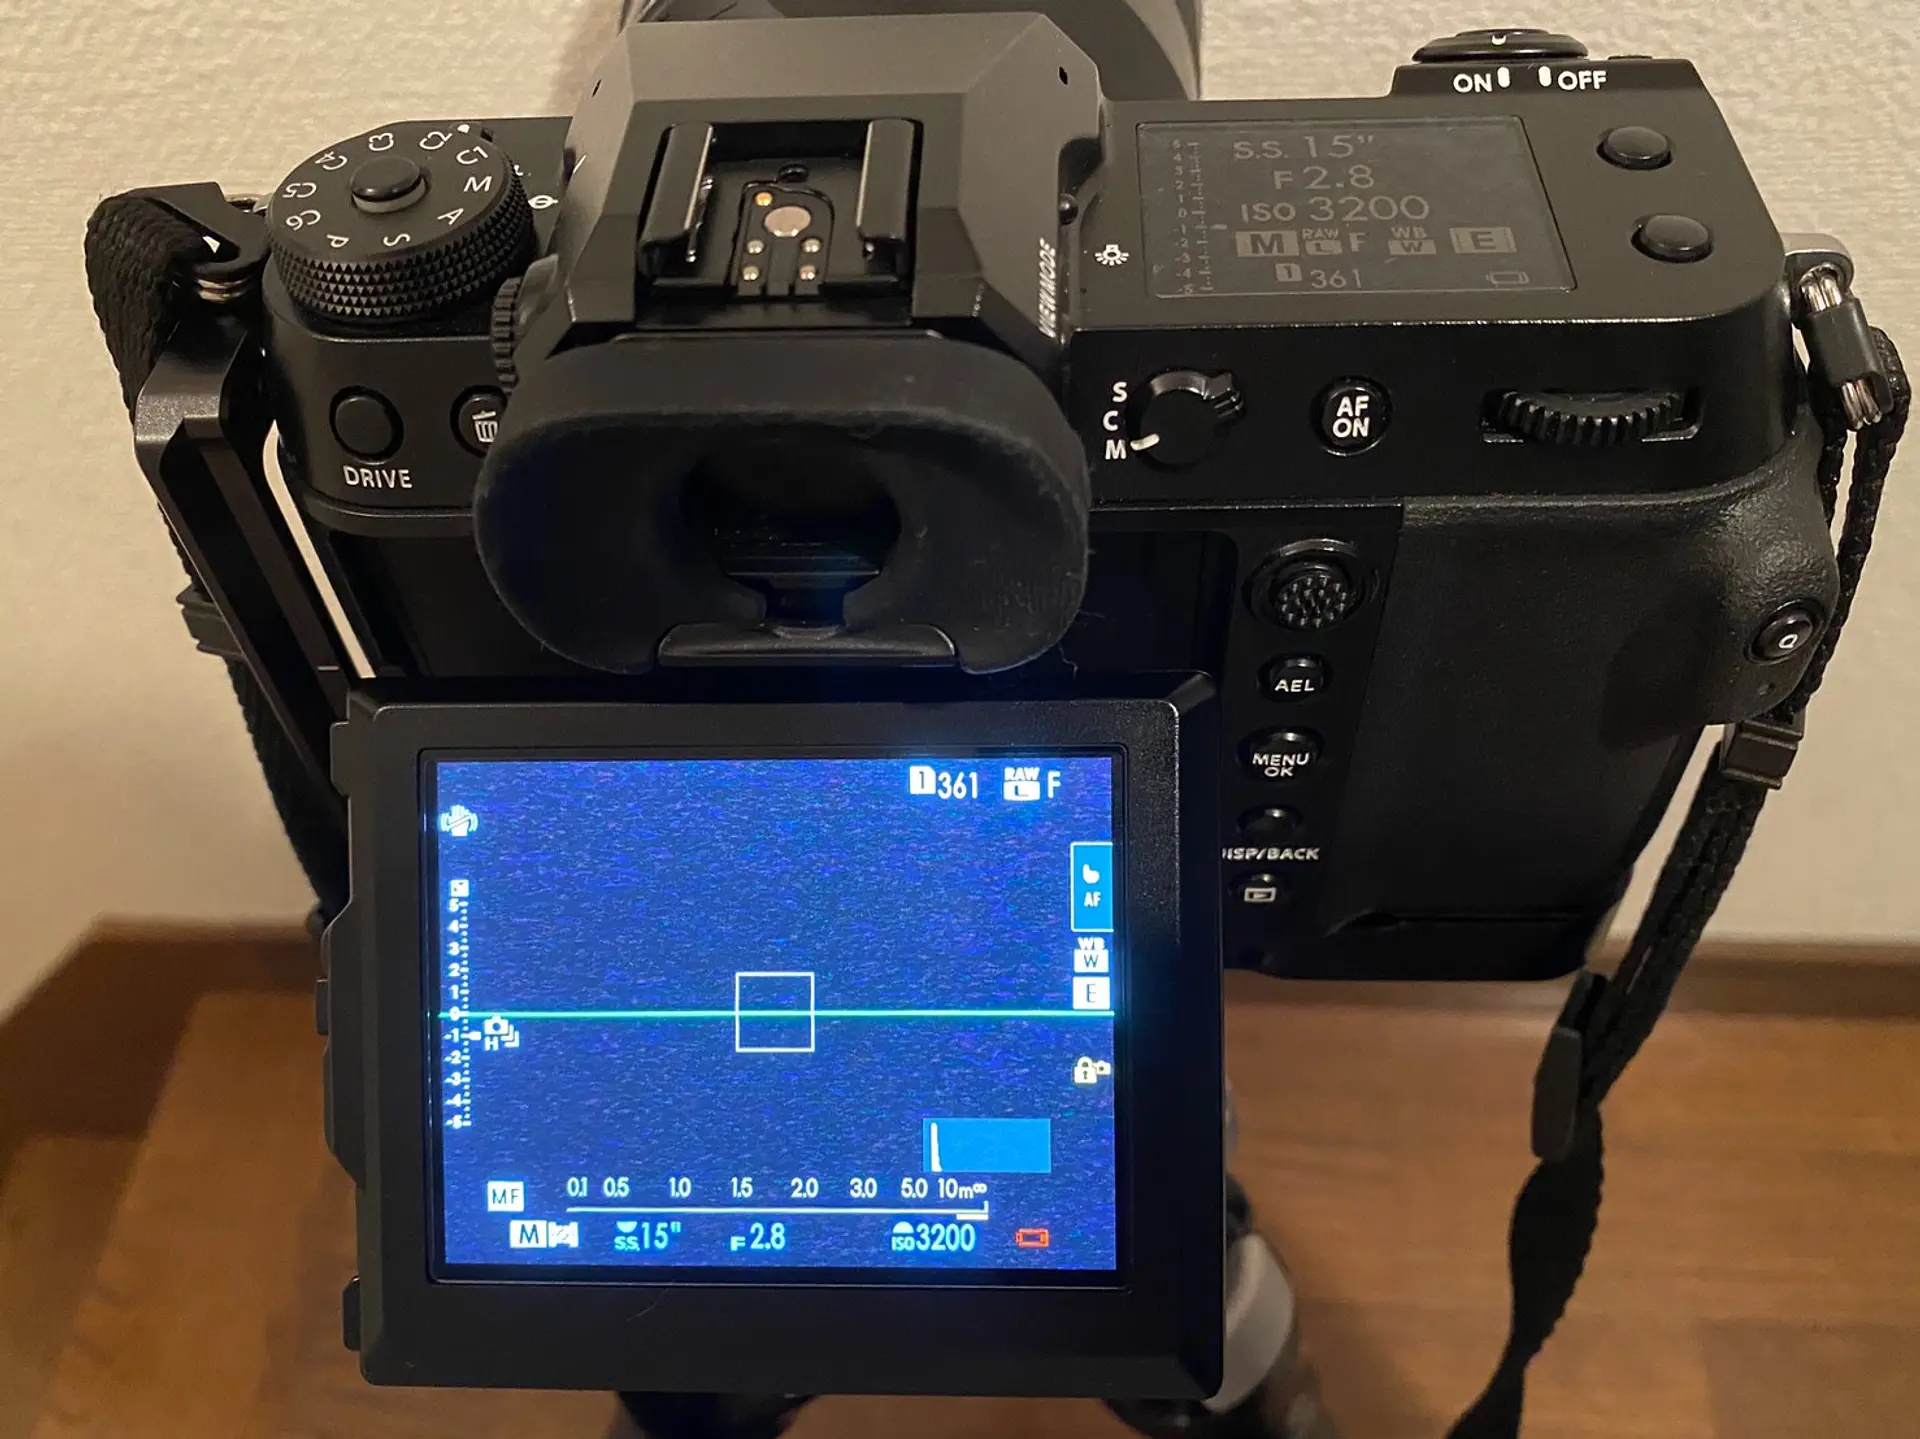
撮影モードですが、星はMモード (マニュアル)です。
前回、前々回の記事ではAモードをお勧めしてきましたが、夜間の撮影では基本的にMモードで撮影します。
サムネイルの写真の撮影設定ですが、
F値:2.8 ISO感度:5000 SS:15秒 で撮影しています。
【F値について】
星撮影で最も肝心なF値は、2~2.8程度が一番いいと思います。
1.8などで撮影すると明るく撮影できますが、周辺の星に収差が発生してしまいます。
F3.5やF4でも撮れないことはないので、それに応じてISO感度やSSを調整しましょう。
【SSについて】
次に大切なのがSS (シャッタースピード)です。
SSを長くすればするほど明るく撮影できます。が、長くしすぎると、地球の自転の影響で星が流れてしまうので要注意です。
流れない目安として、「500ルール」というものもあり、これを使うと簡単に流れないSSの目安を知ることができます。
それが以下の式となります。
500÷焦点距離=目安のSS
例)焦点距離が20mmの場合
500÷20=25
つまり20mmで撮影するときは25秒まで流れないと言うことになります。
【ISO感度について】
ISO感度はF値、SSを決めた後に実際に撮影しながら、調節するといいと思います。
1600程度から徐々に上げていき、自分好みの明るさを決めましょう。
ここで注意点ですが、ISO感度を上げすぎるとノイズがたくさん出てしまいます。カメラによってノイズの出やすさは異なりますが、上げすぎは禁物です。
最後に、私の写真だけでは作例が物足りないので、お友達に友情出演していただきます。
とてもいい写真ばかりなので、ぜひ彼らのInstagramもチェックしてみてください!
・まとめ
最後まで読んでいただきありがとうございました。
これを見て大台ヶ原で星を撮ってみたいと思ってくれる方がいたら嬉しいです。
星は場所によって本当に見え方が変わってきます。
いつもの場所で、あまりきれいに星が撮れない。光害が気になる。という方は一度足を伸ばして大台ヶ原まで行ってみてはいかがですか?きっとこれまで見たことのない満点の星空に感動すると思います。
では、また次の記事でお会いしましょう。
Koshi Iguchi の前回の記事はこちら↓
初夏の登山はここで決まり!三重が誇る秘境・大杉谷「シシ淵」
Koshi Iguchi のInstagramもチェック↓
Koshi Iguchi Instagram
.png)