四日市の工場夜景撮影スポット 四日市港ポートビル うみてらす14などを地図付きで紹介します
掲載日:2017.01.07
最近は絶景撮影スポットとして三重県四日市市の工場が注目を集めています。デジタル一眼レフカメラやミラーレスカメラを買ったならぜひ撮影に行きたいスポットをご紹介。撮影方法についても簡単にご紹介します。
四日市の工場夜景撮影スポットをご紹介します!実際に写真撮影に行ってきました。
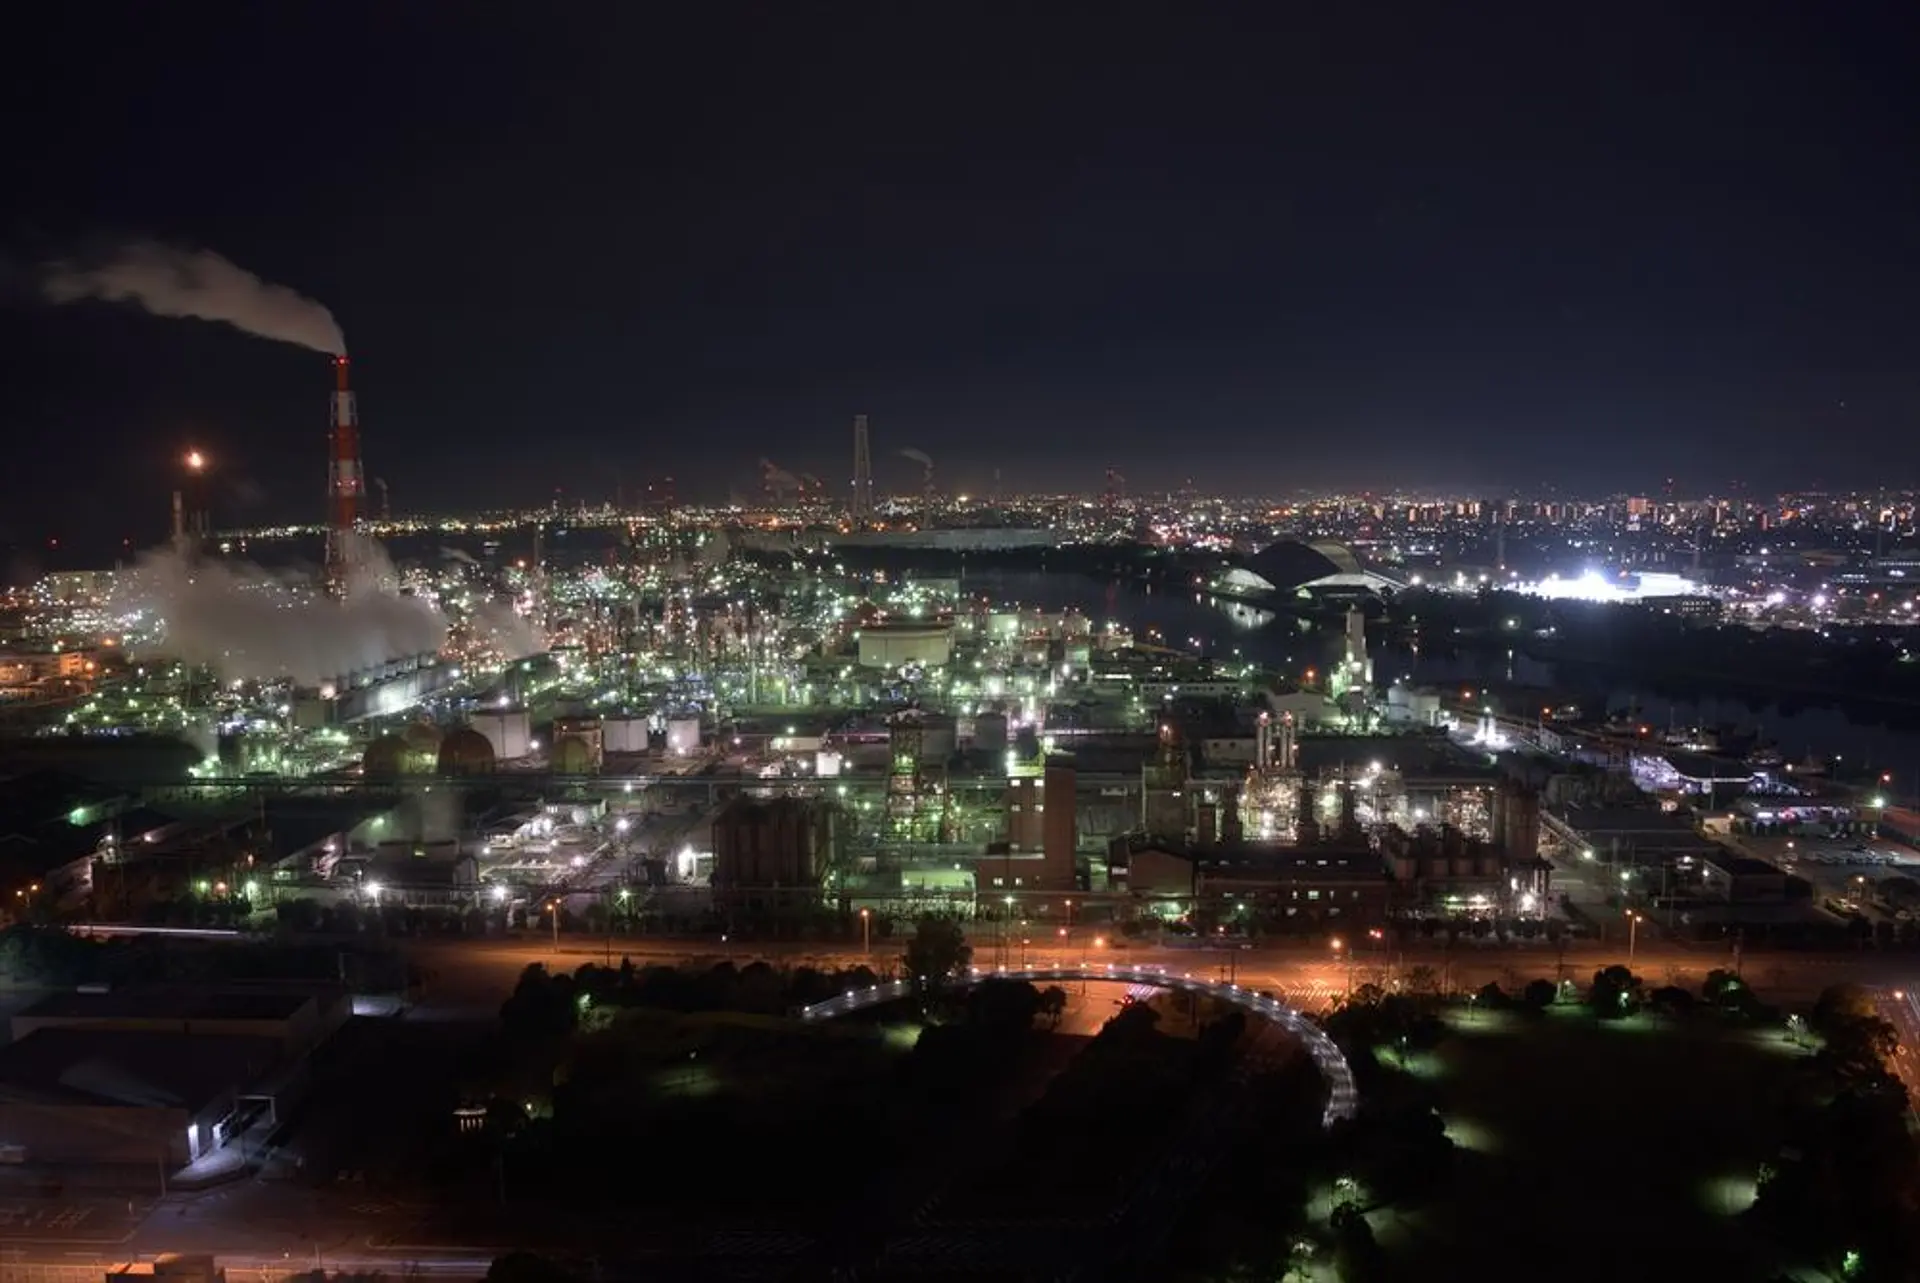
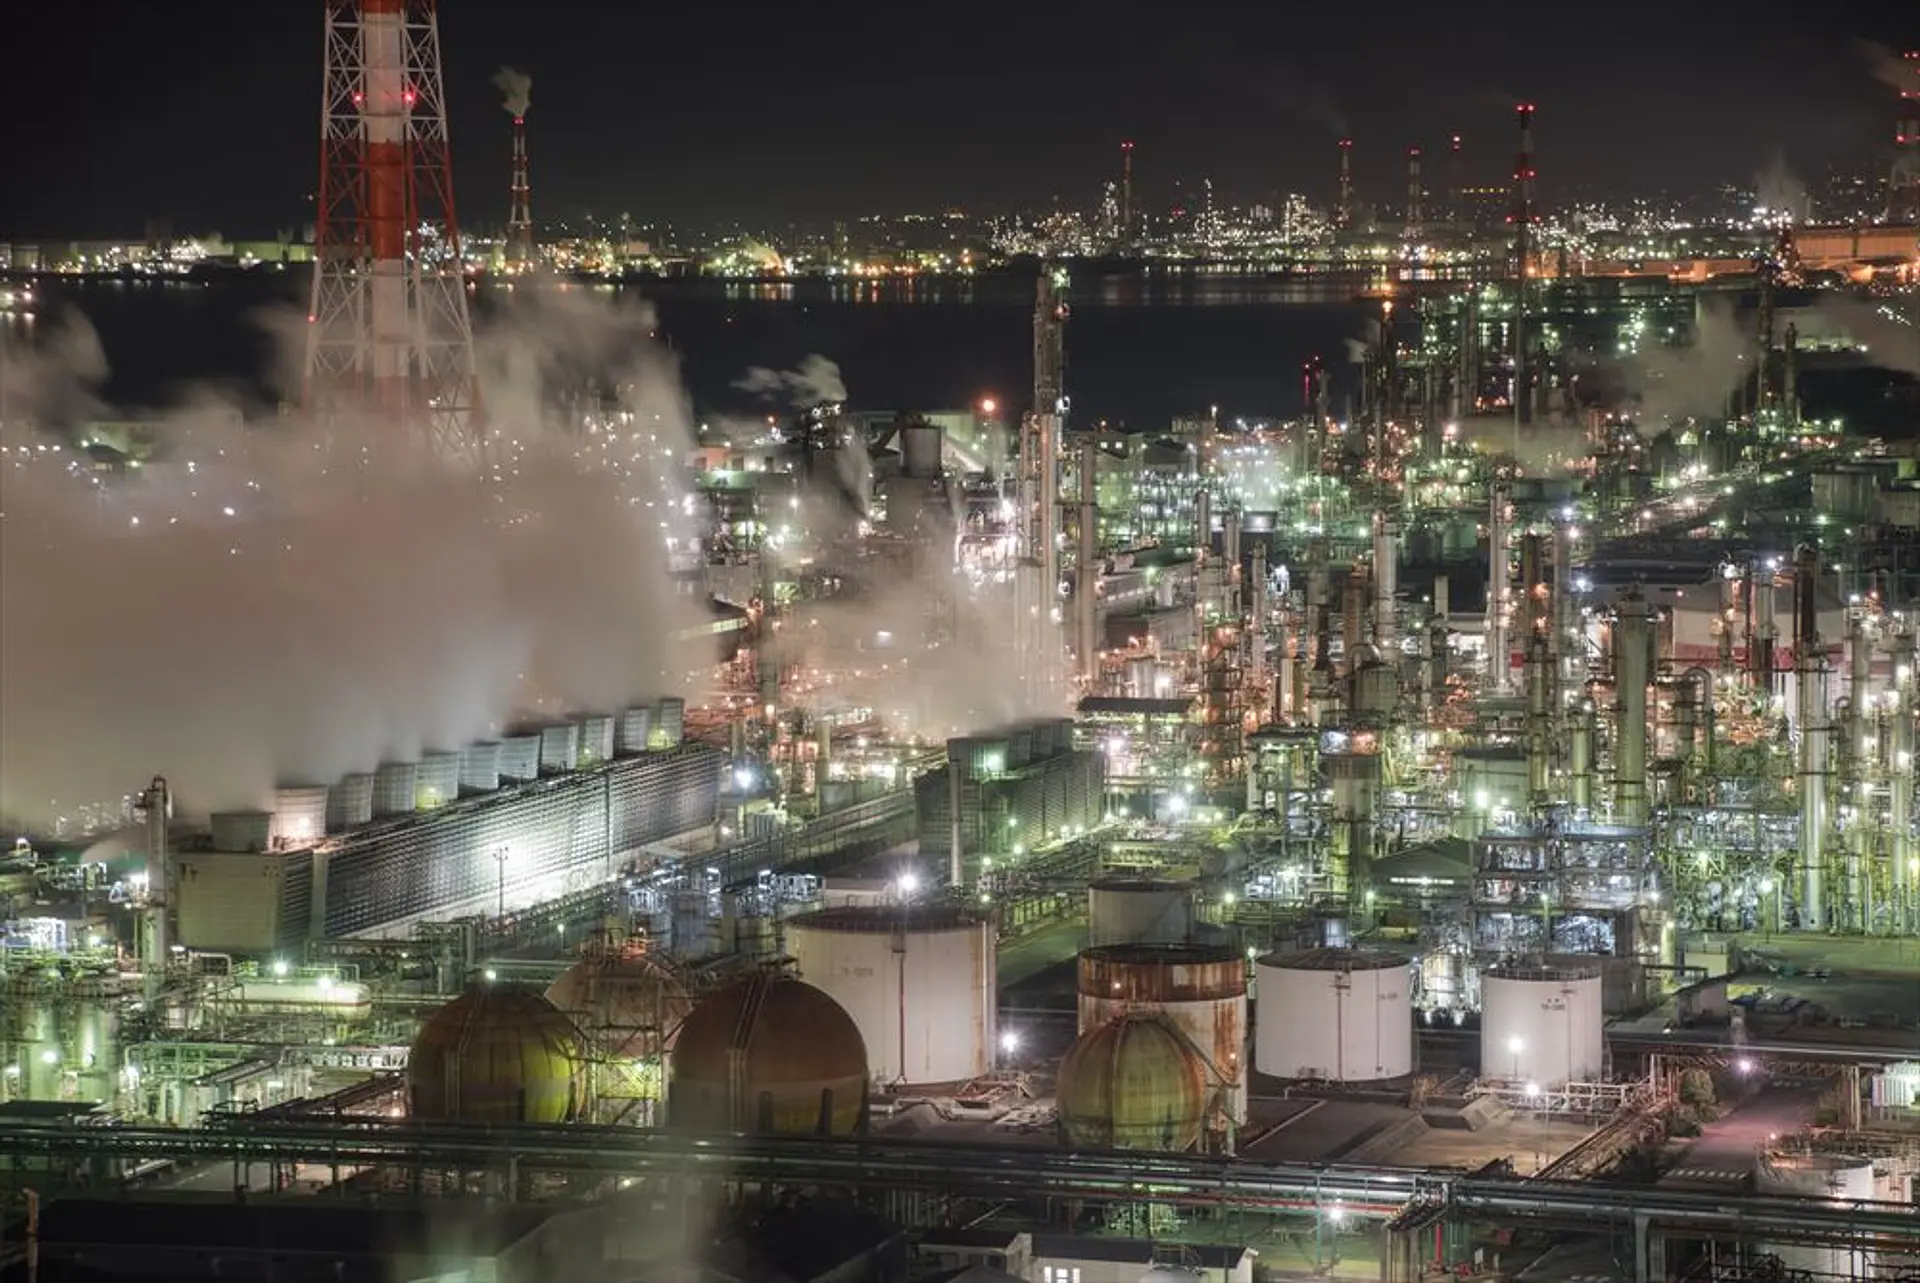
まずは一番メジャーなスポット、日本夜景遺産にも認定された四日市港ポートビル うみてらす14(地図①)からの夜景です。高さ約90メートルから一面に広がる四日市コンビナートの夜景はまさに絶景!展望室の中から撮影できますので、気温や風にかかわらず安定して撮影することができます。土曜日・日曜日・祝日が開館時間21時までとなります。
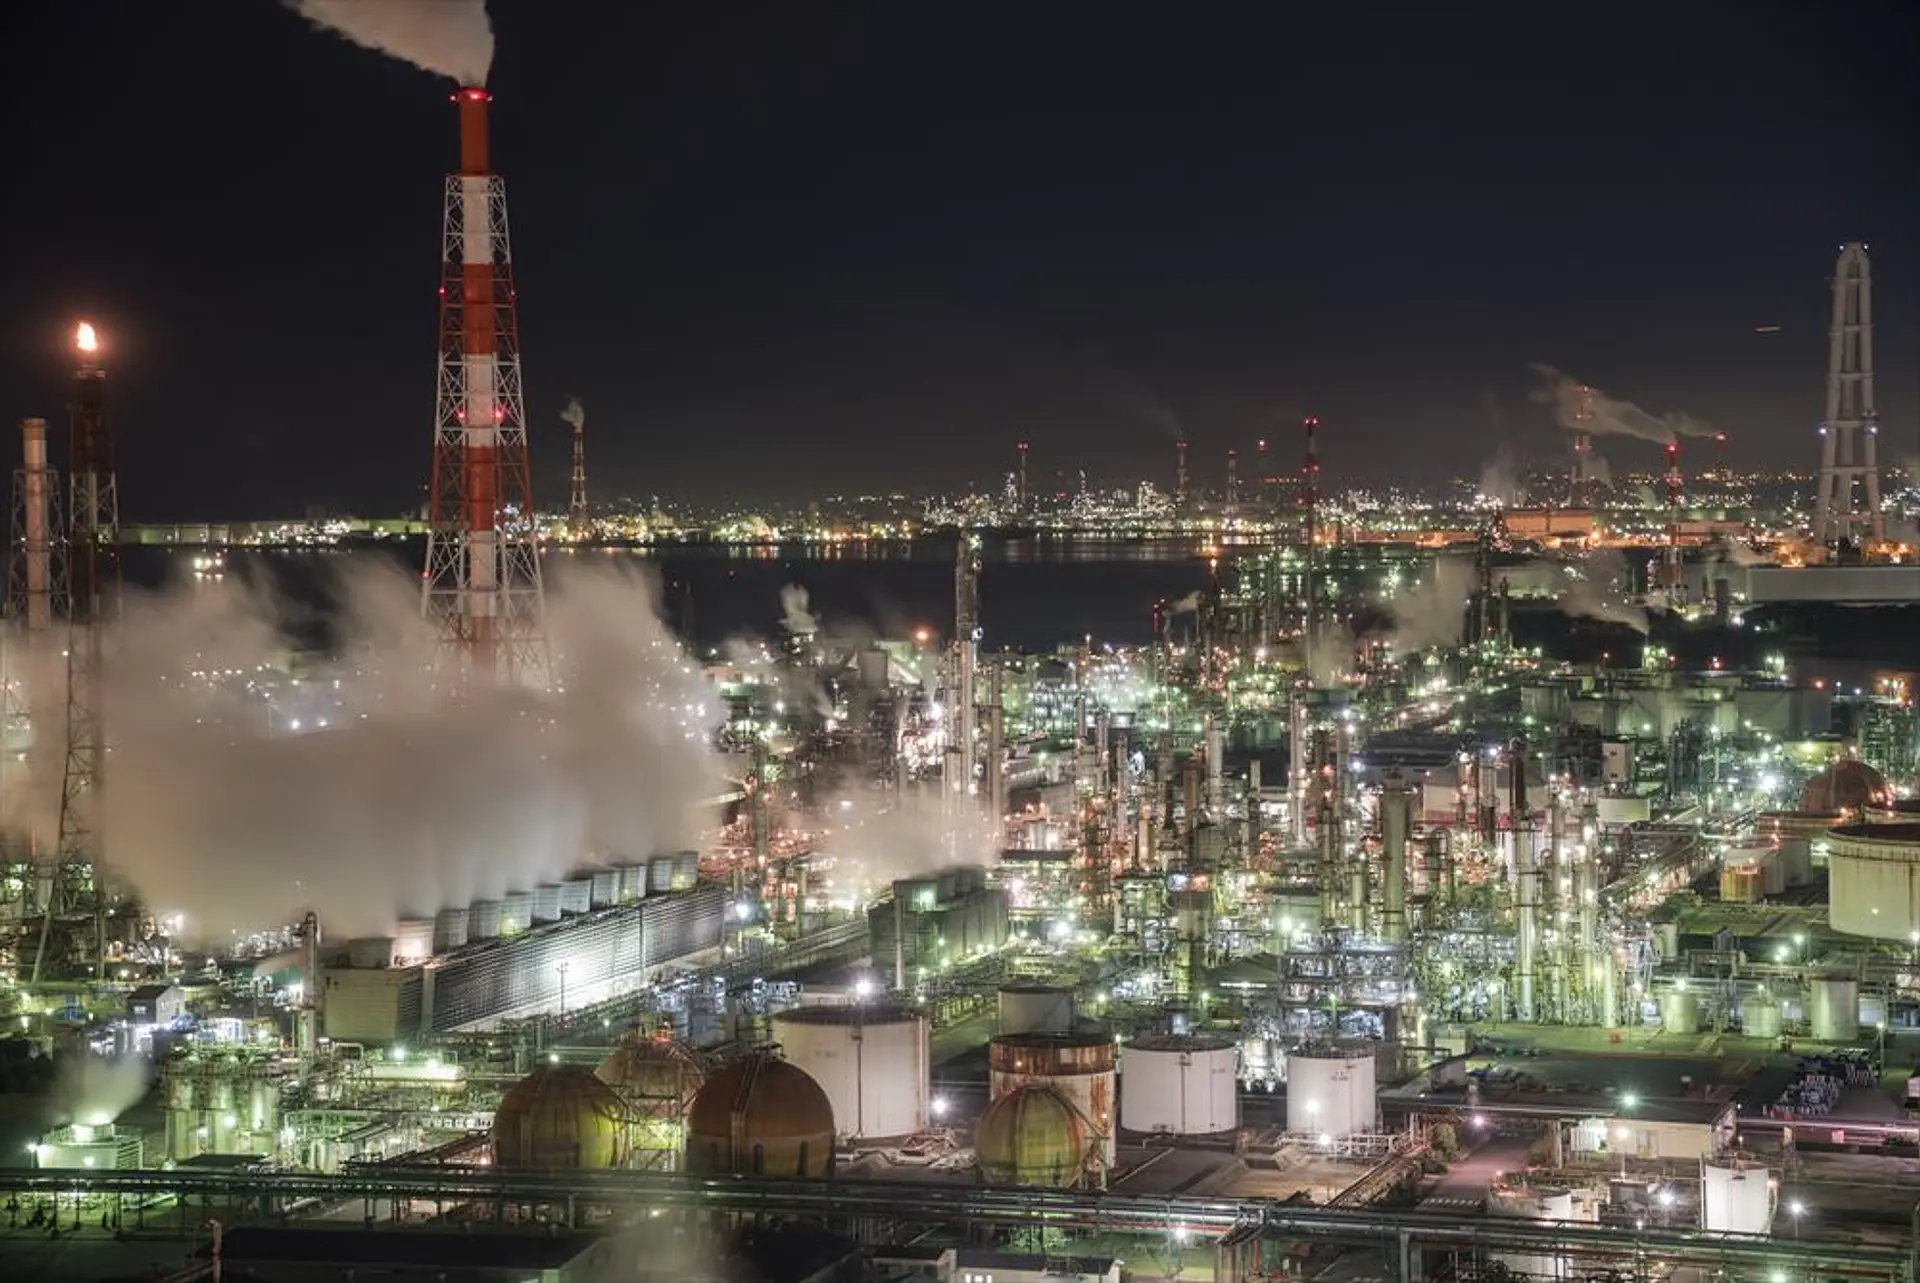
ガラス越しの撮影となりますが、係の方に頼めば暗幕が借りられます。ガラス面の反射がありますので気を付けながら撮影しましょう。※暗幕の数には限りがありますのでご注意ください。お持ちの方はご持参をおすすめします。ちなみに展望展示室にはカップル・夫婦・ご家族の方だけでなく、写真撮影のためにお一人で来ている方もたくさんいらっしゃいました。
撮影時には広角~標準が良いのですが、望遠レンズもおすすめ。一望する写真だけでなく、工場の一部を切り取る写真を狙ってみてはいかがでしょうか。28-300mmなどのズームレンズがあると便利です。四日市港ポートビルうみてらす14のホームページでは綺麗な写真がアップされています。イベントも開催されていますのでチェックしてくださいね。
開館時間:午前10時〜午後5時 土・日・祝日は午後9時まで ※入場は閉館30分前まで
入場料:一般(高校生以上)300円、中学生以下
無料駐車場:有り
URL:四日市港ポートビル

次は地図② 霞ケ浦緑地公園、四日市ドーム周辺のスポットです。こちらは四日市ドームの海側に道があり、長さ約200メートルほどの運河となっています。撮影スポットはいくつかありますが、運河に映る光も一緒に狙ってみましょう。丸いタンクが入るとかわいい(?)写真になります。
駐車場がありますのでゆっくり夜景を楽しみながら撮影できます。こちらは広めに撮れるスポットですので広角レンズを使えば光が横に並ぶ綺麗な写真が撮れます。24mmで撮影したのですが、手すりが入っていました(家に帰ってから気づきました…)。高めの三脚があった方がいいと思います。
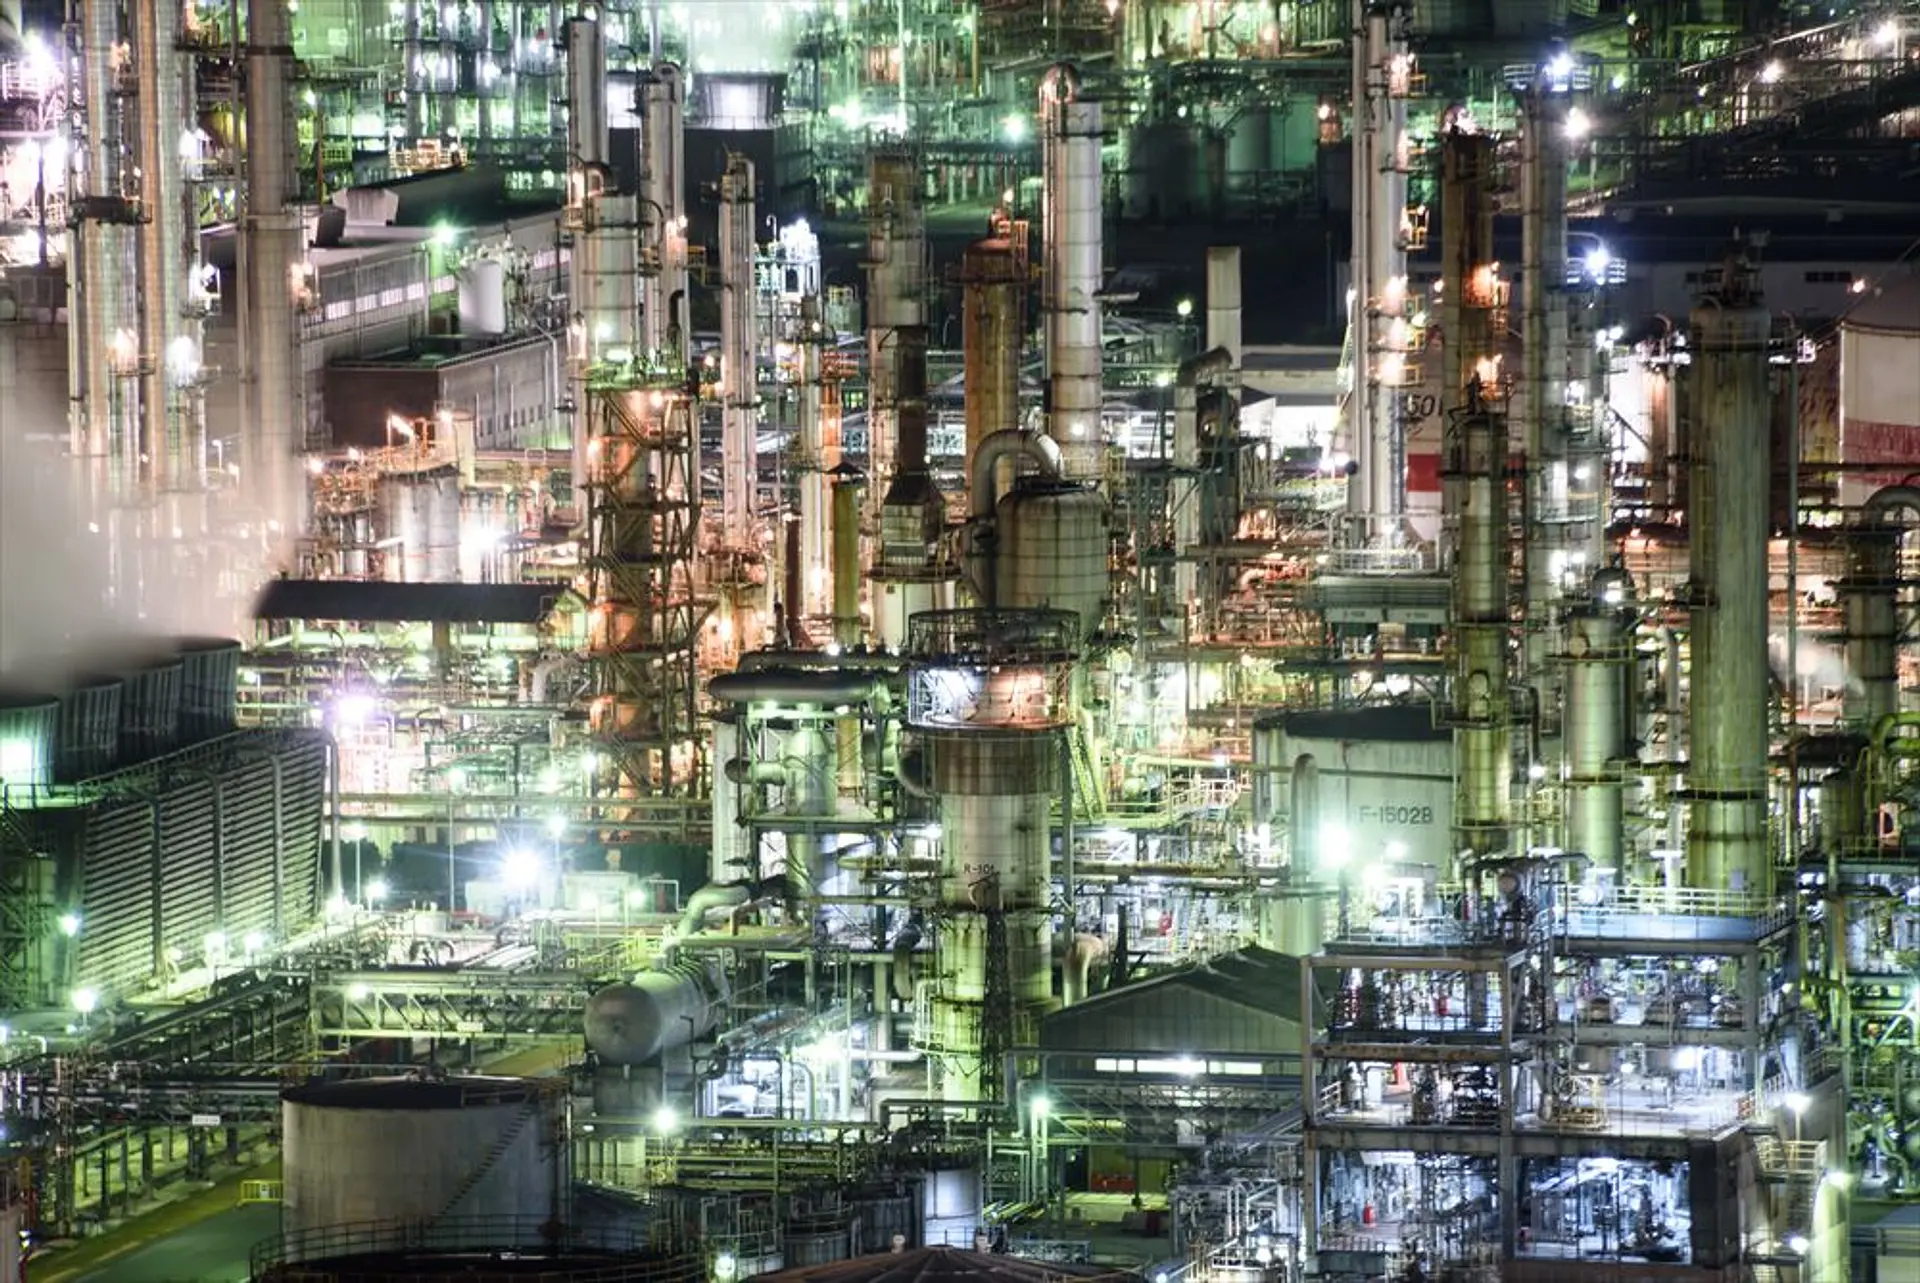
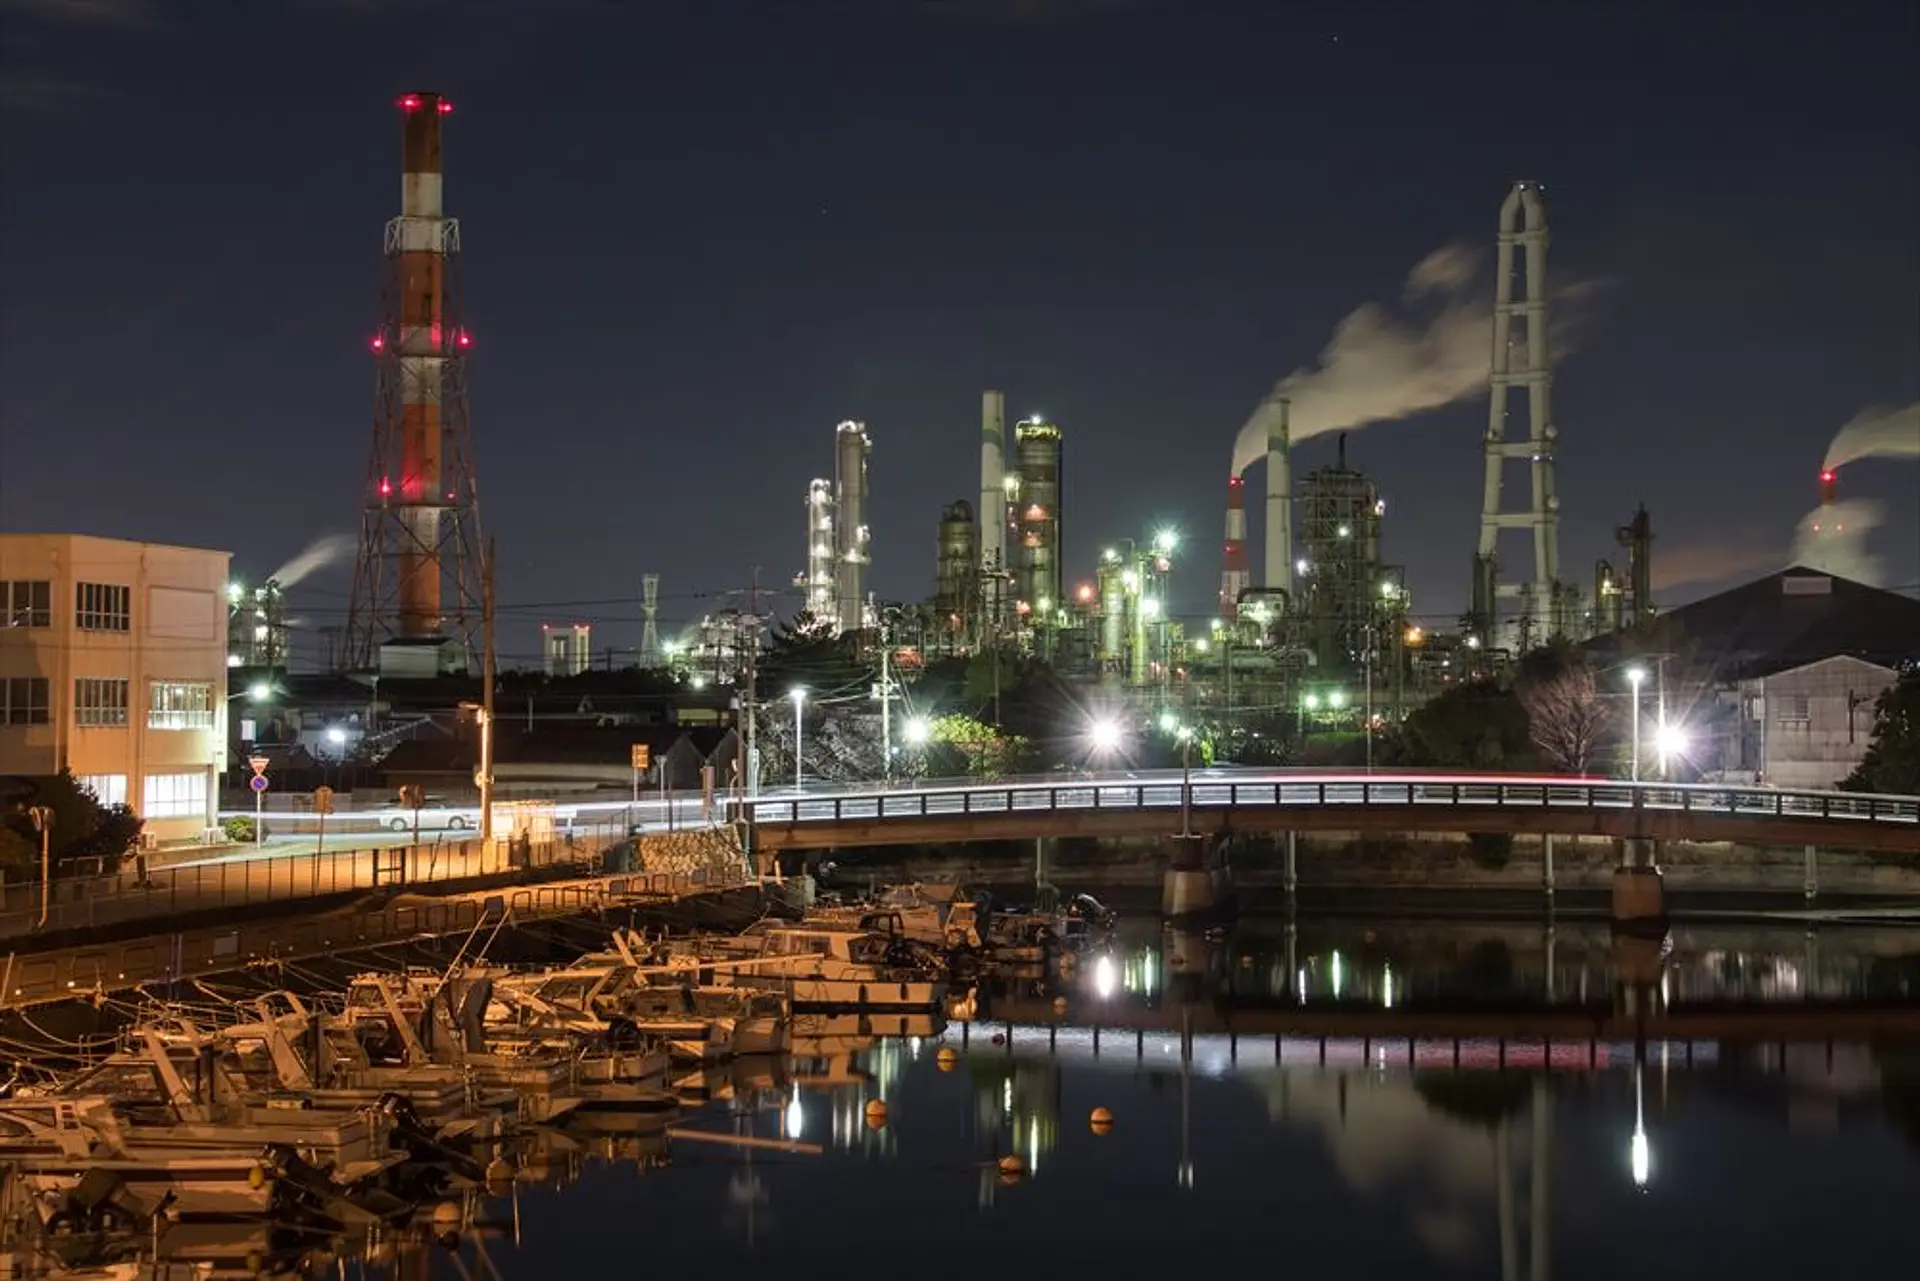
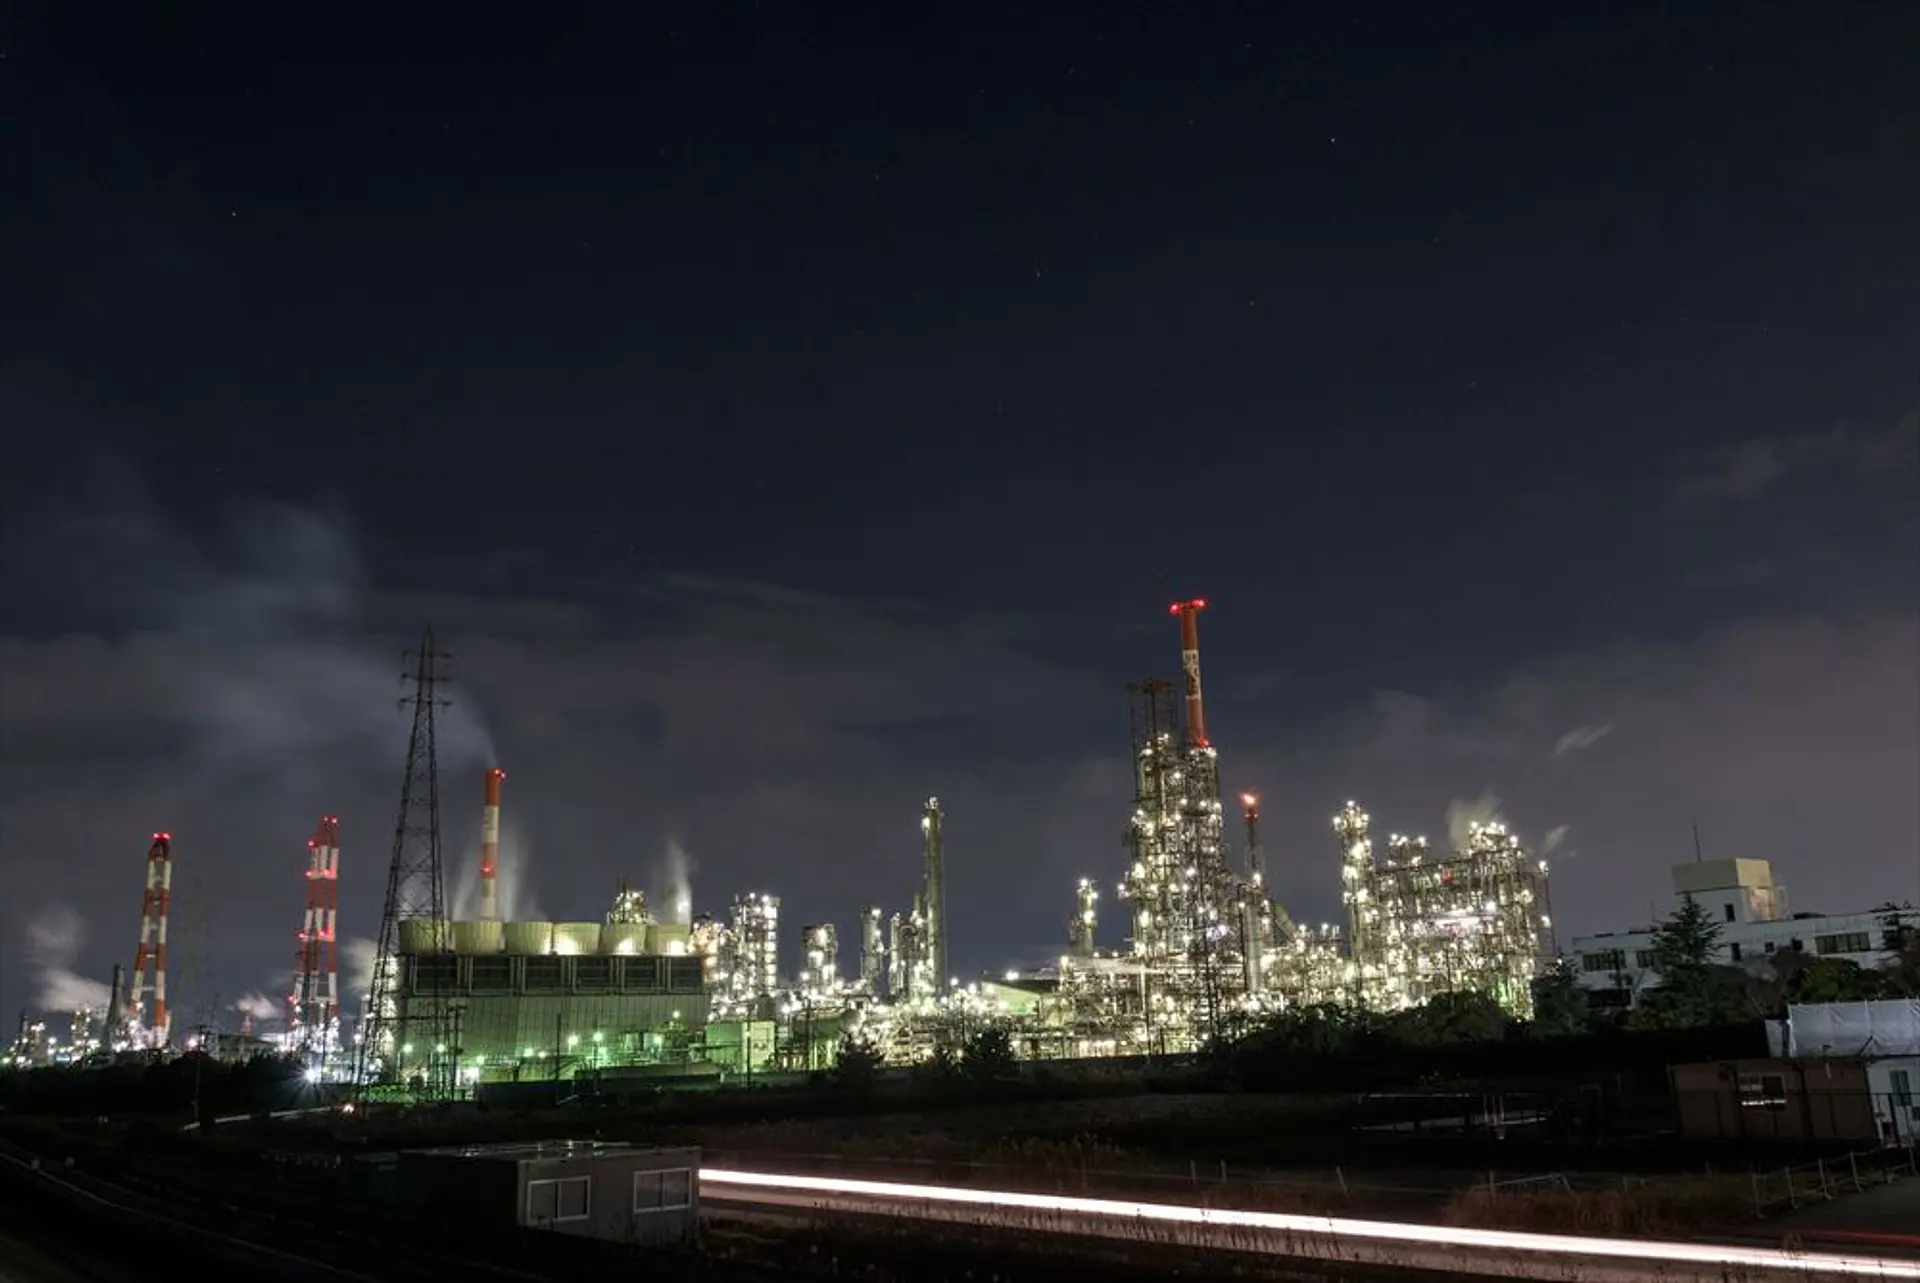
次は国道23号のすぐそば、地図③ 大正橋脇の堤防からの撮影です。かなりのメジャースポットで、簡単に撮影できる割にきれいな写真が撮れます。配管ひとつひとつまでクッキリ映る写真はまるでSF映画のよう。
こちらも三滝川に映る光が印象的。堤防がありますので、その上に置くミニ三脚があると狙った画角で撮影できます。通常の三脚使用時はかなり高めの物が必要です。駐車場がありませんので、三滝公園に停めてから歩きましょう。国道23号は夜も交通量が多いので気を付けてください。
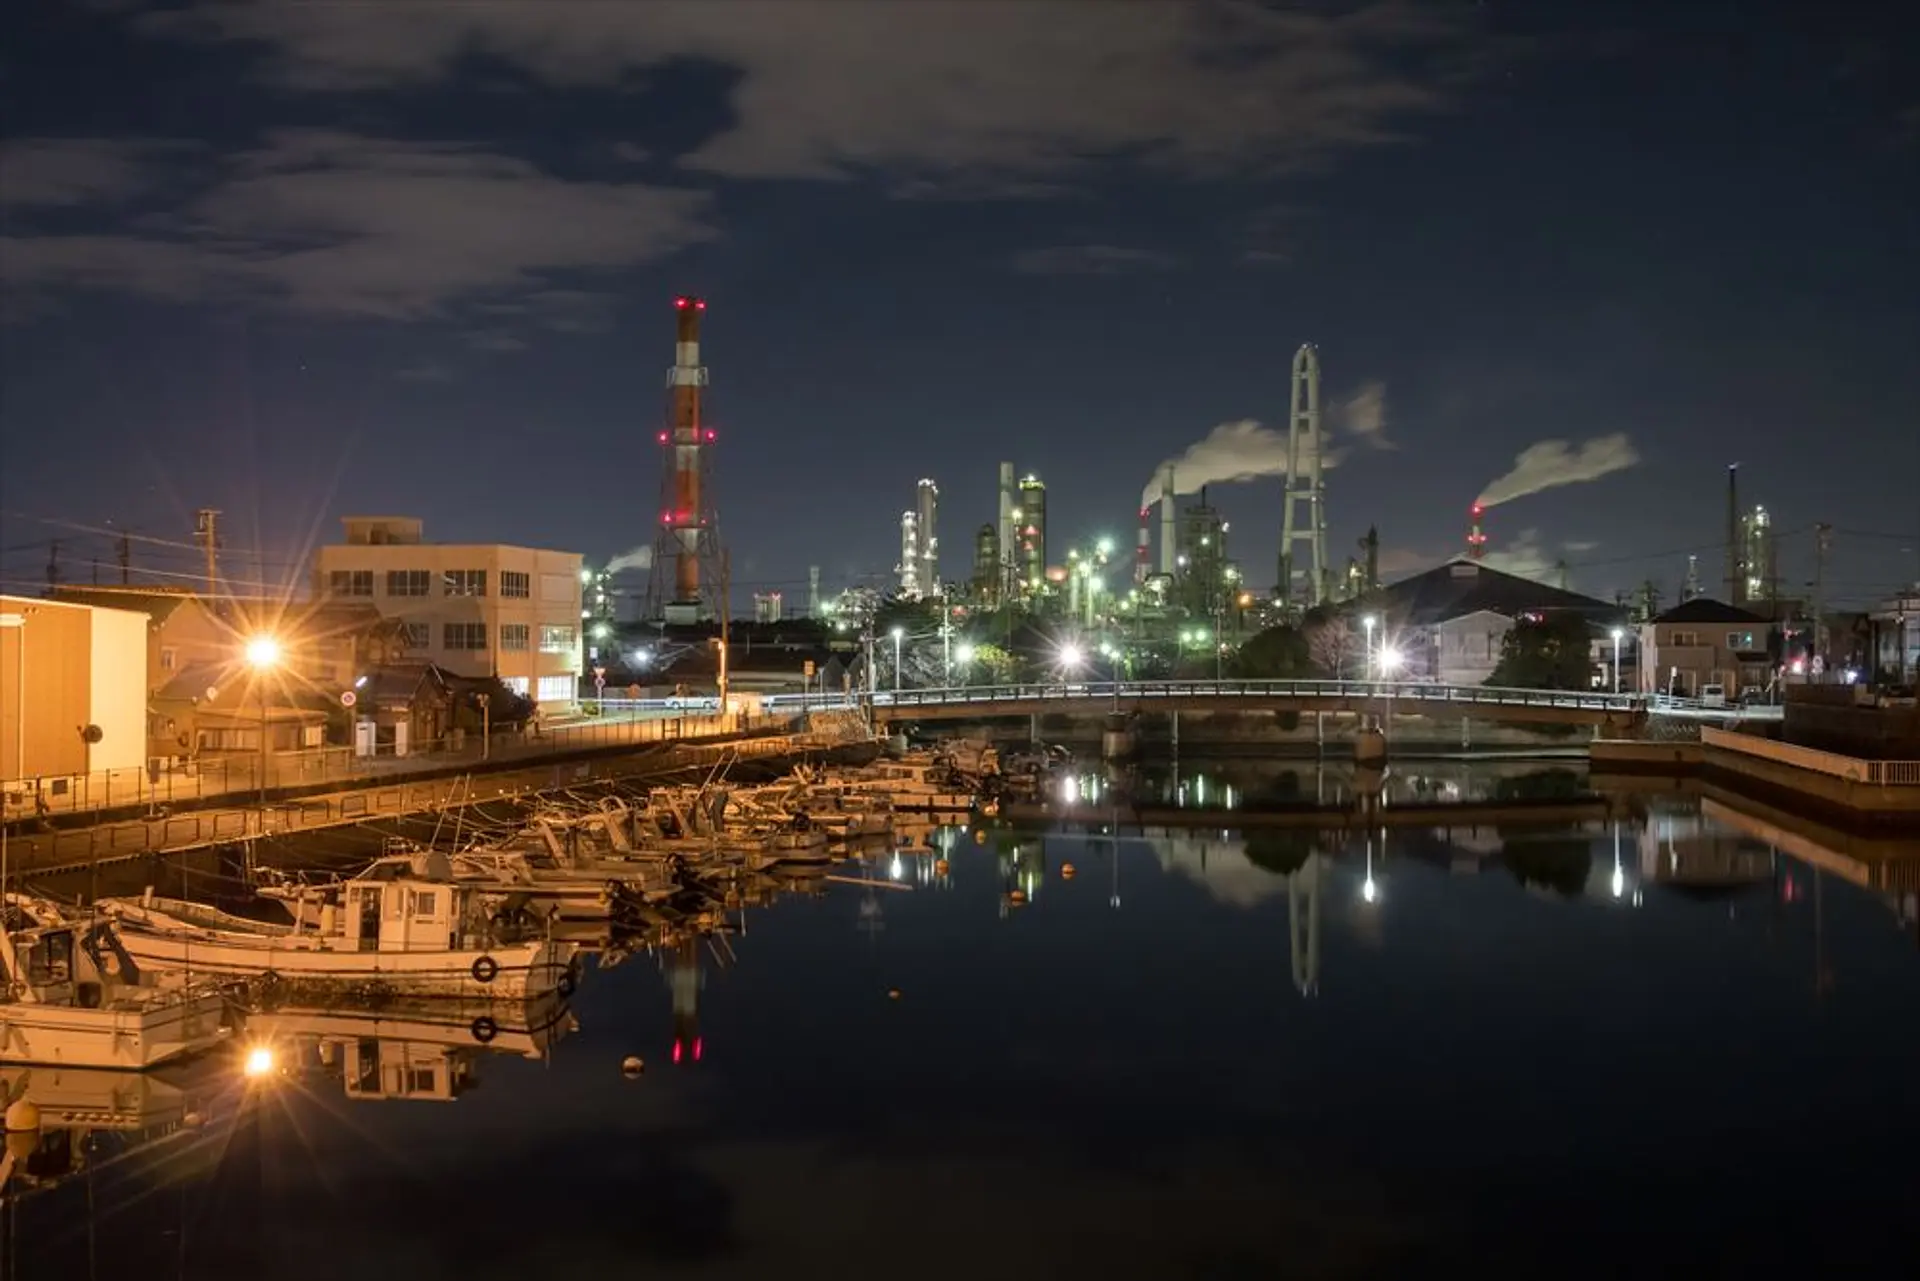
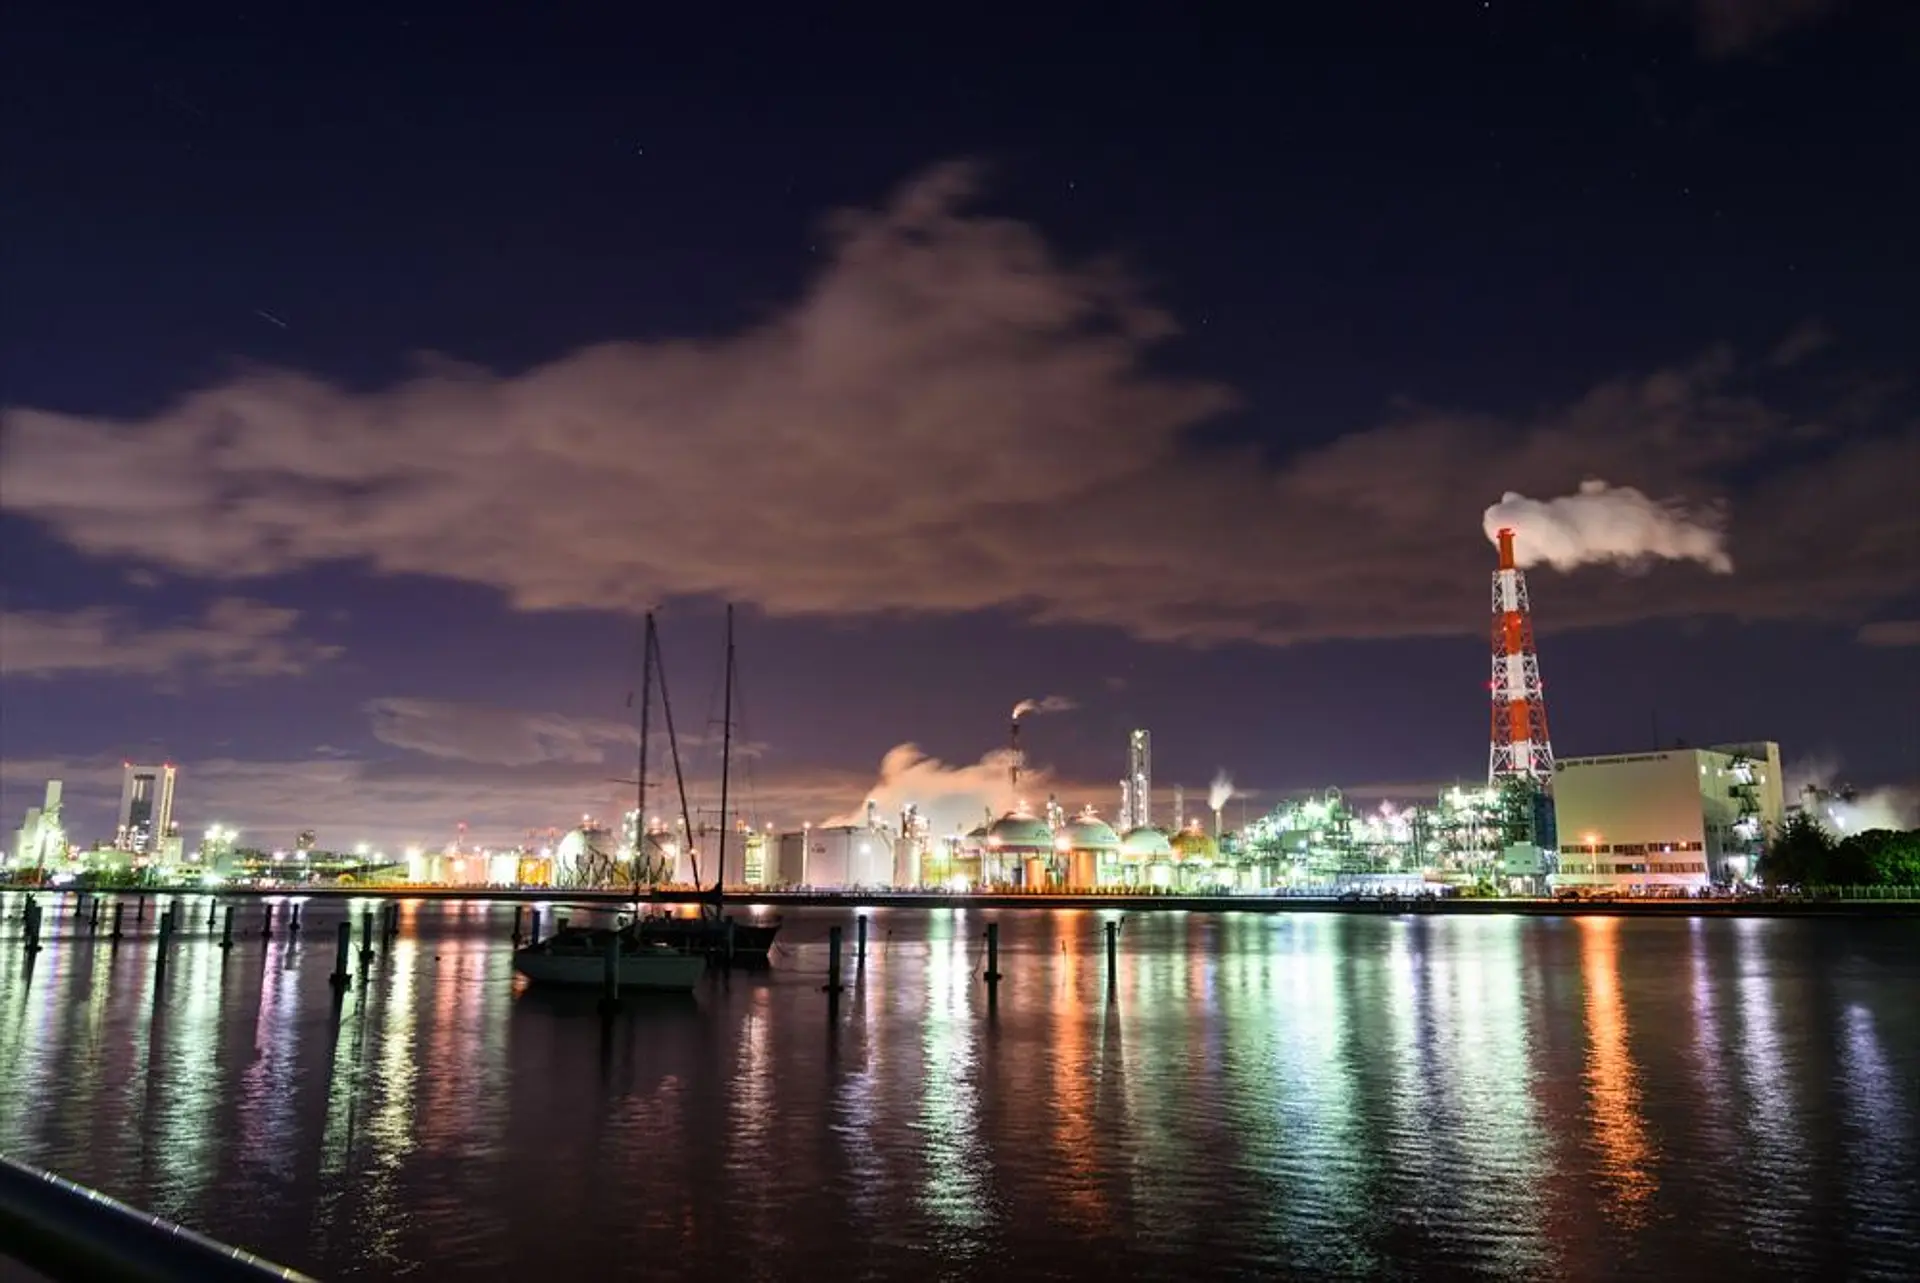
大正橋から歩いて移動できる距離にある地図④ 相生橋。川に停泊する船を一緒に撮影することができます。大正橋からの撮影時と同じ方角に向かって撮影します。
こちらも水面に映る船や光が綺麗です。観光三重ではフォトコンテストを定期的に開催していますが、ここからの写真がよく投稿される人気スポットです。観光三重フォトコンテスト
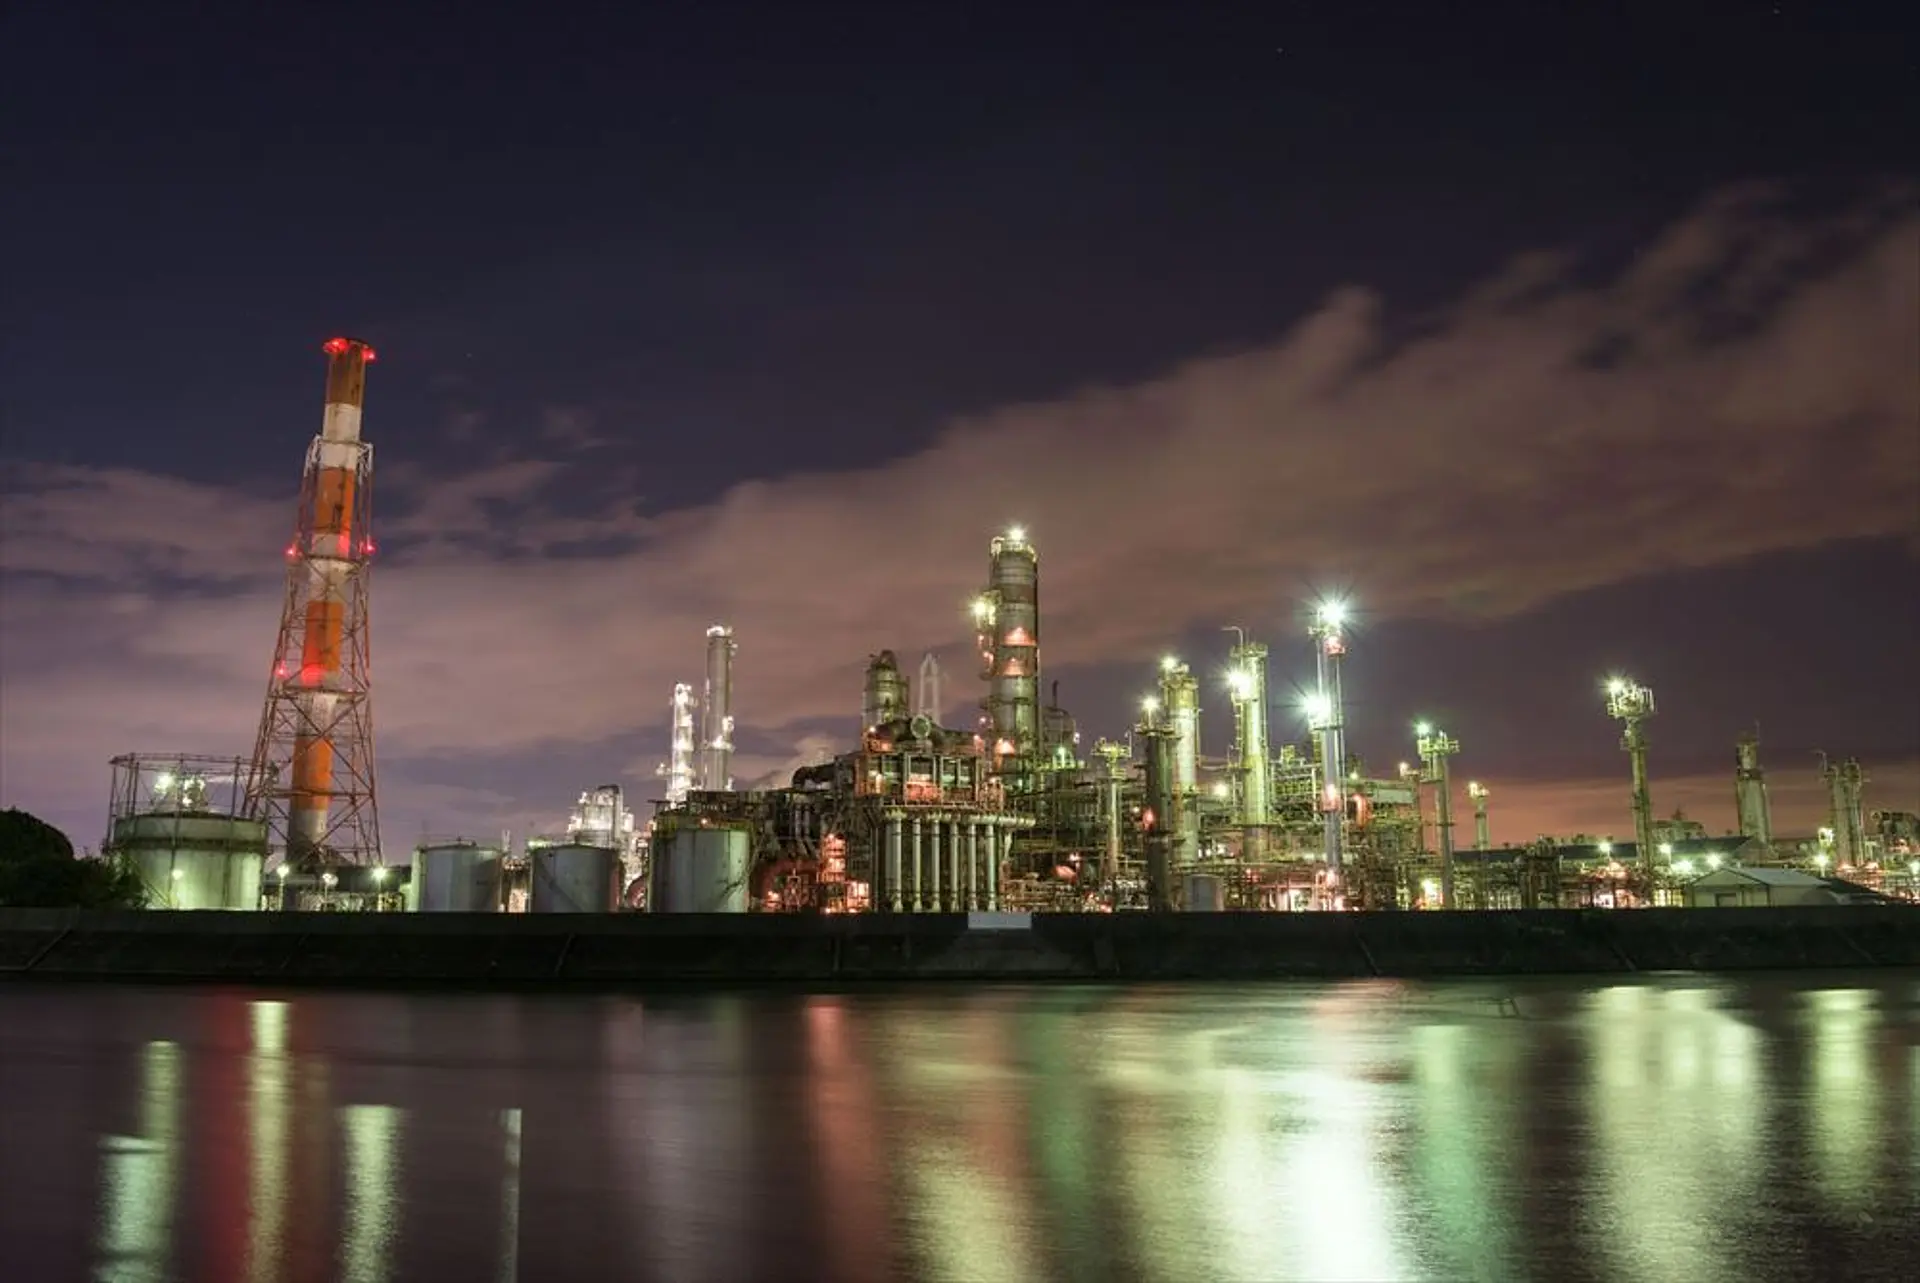
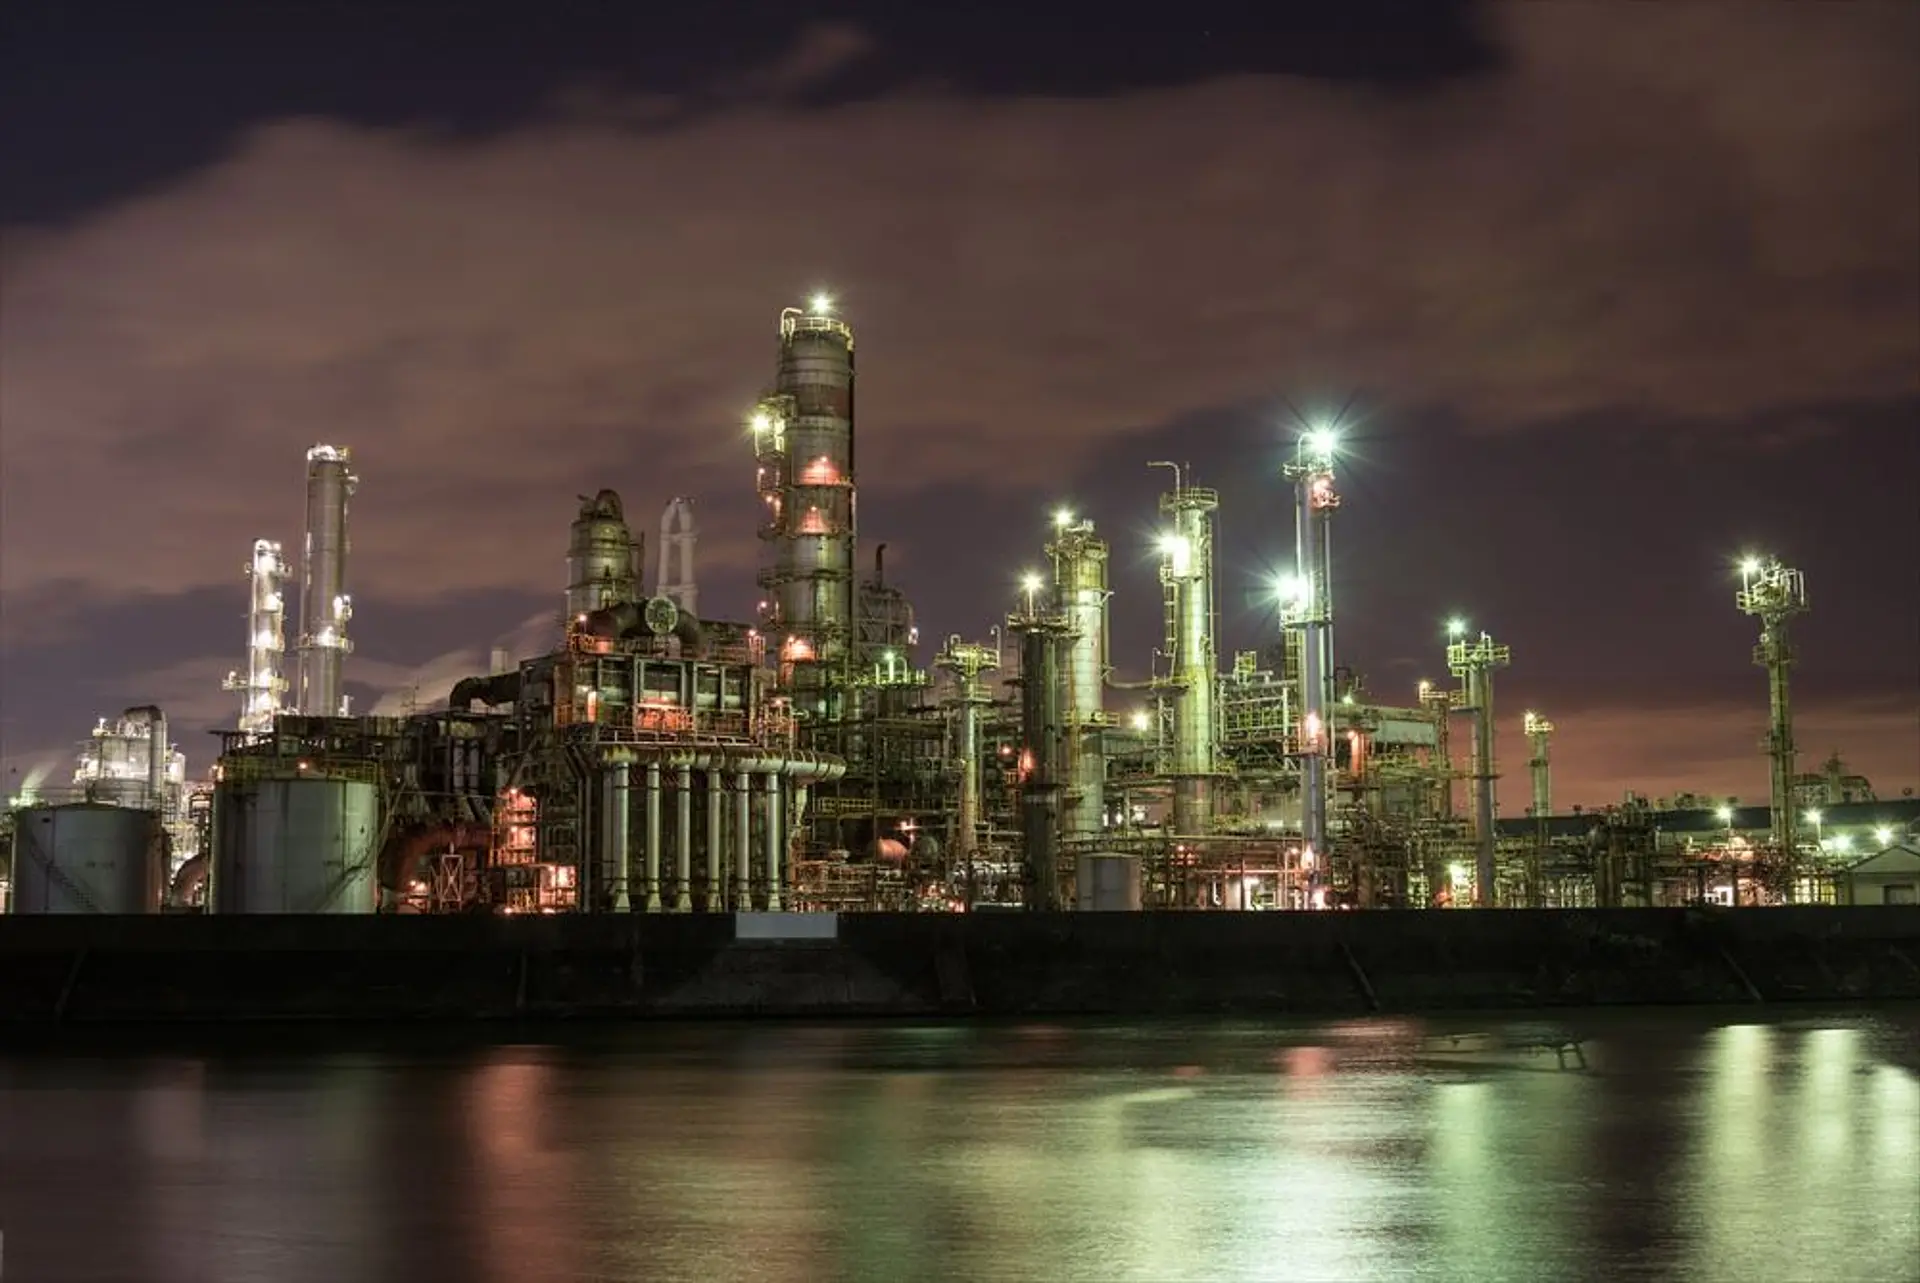
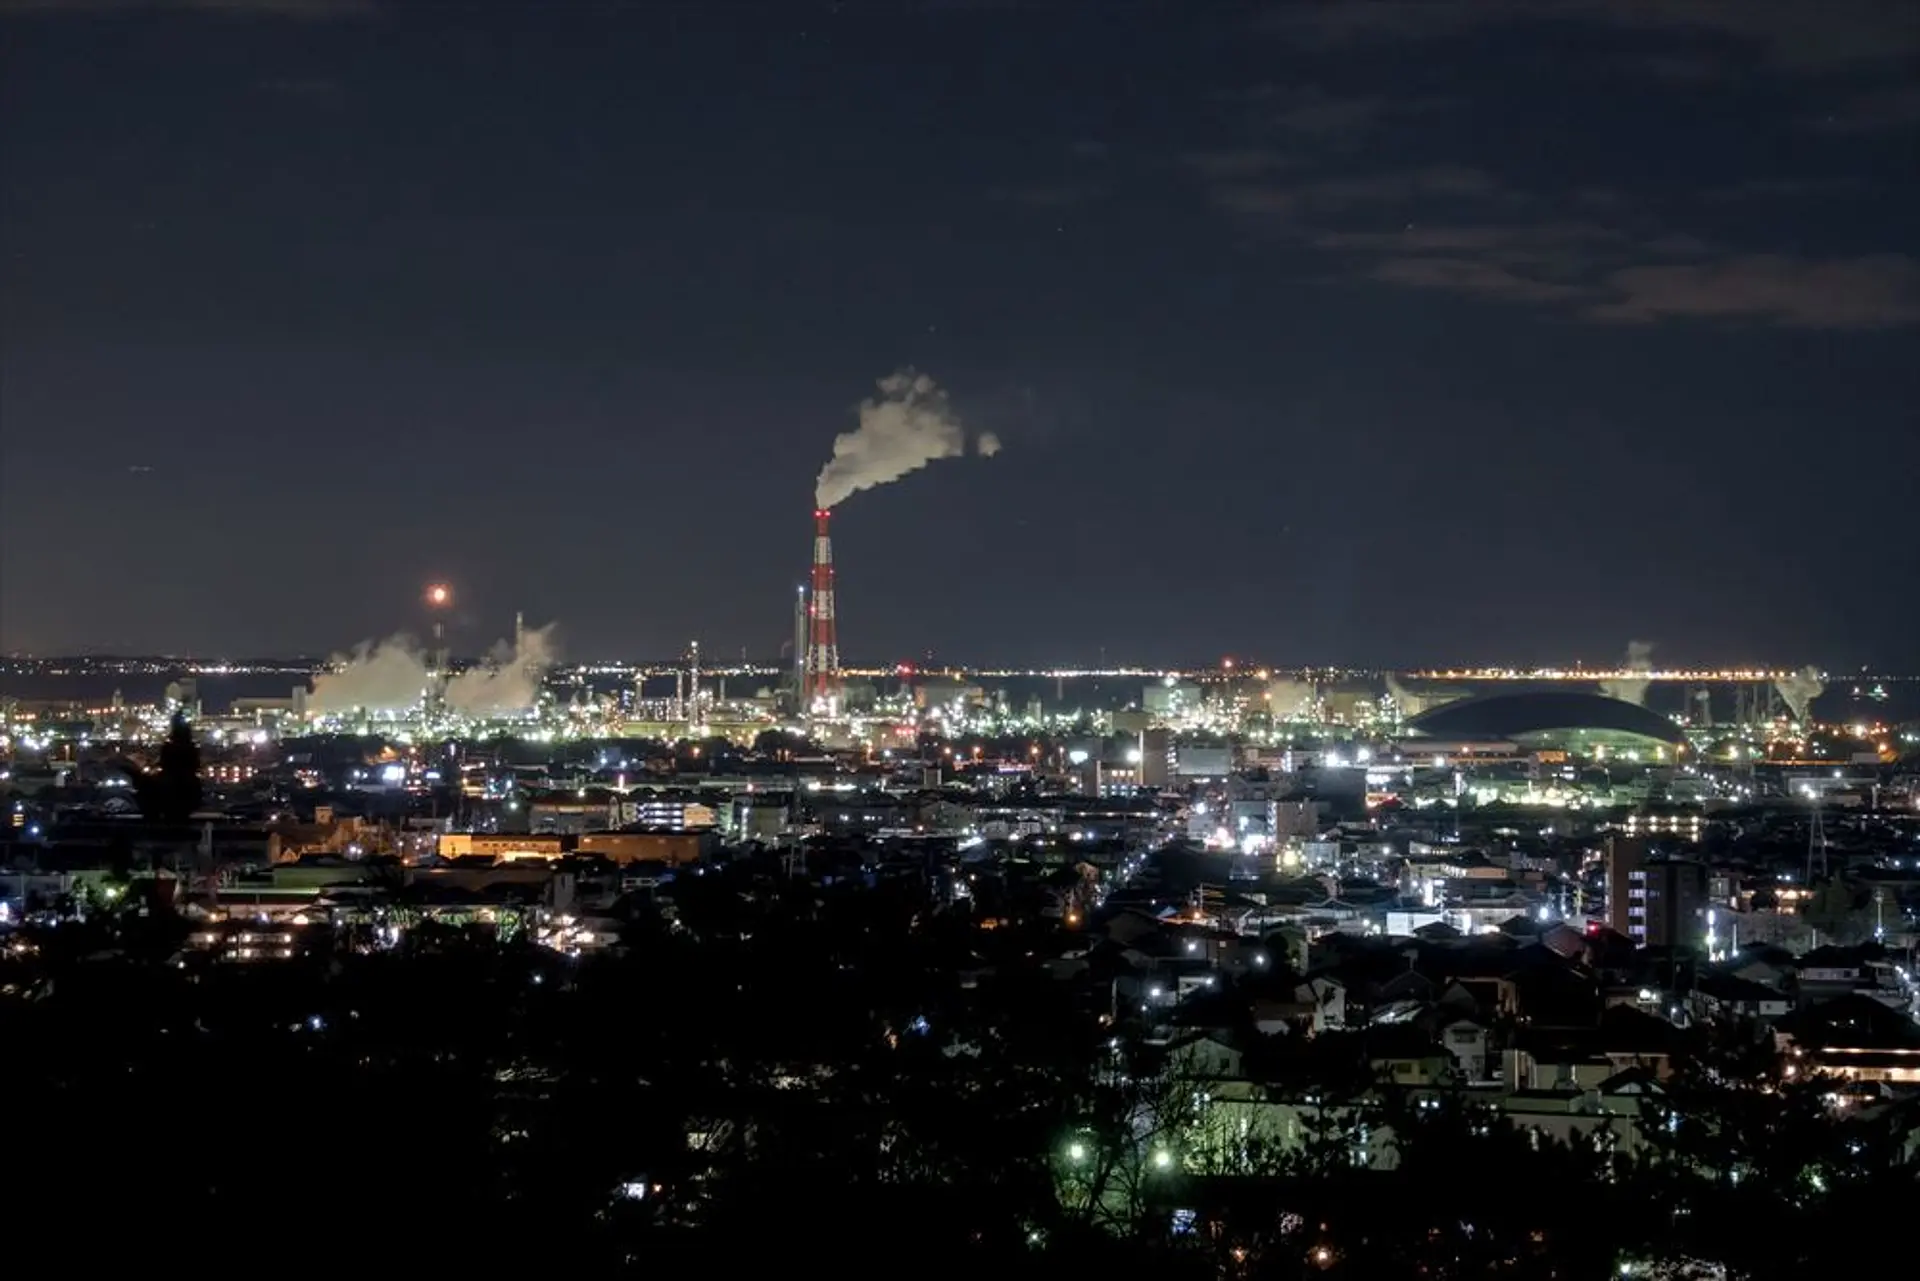
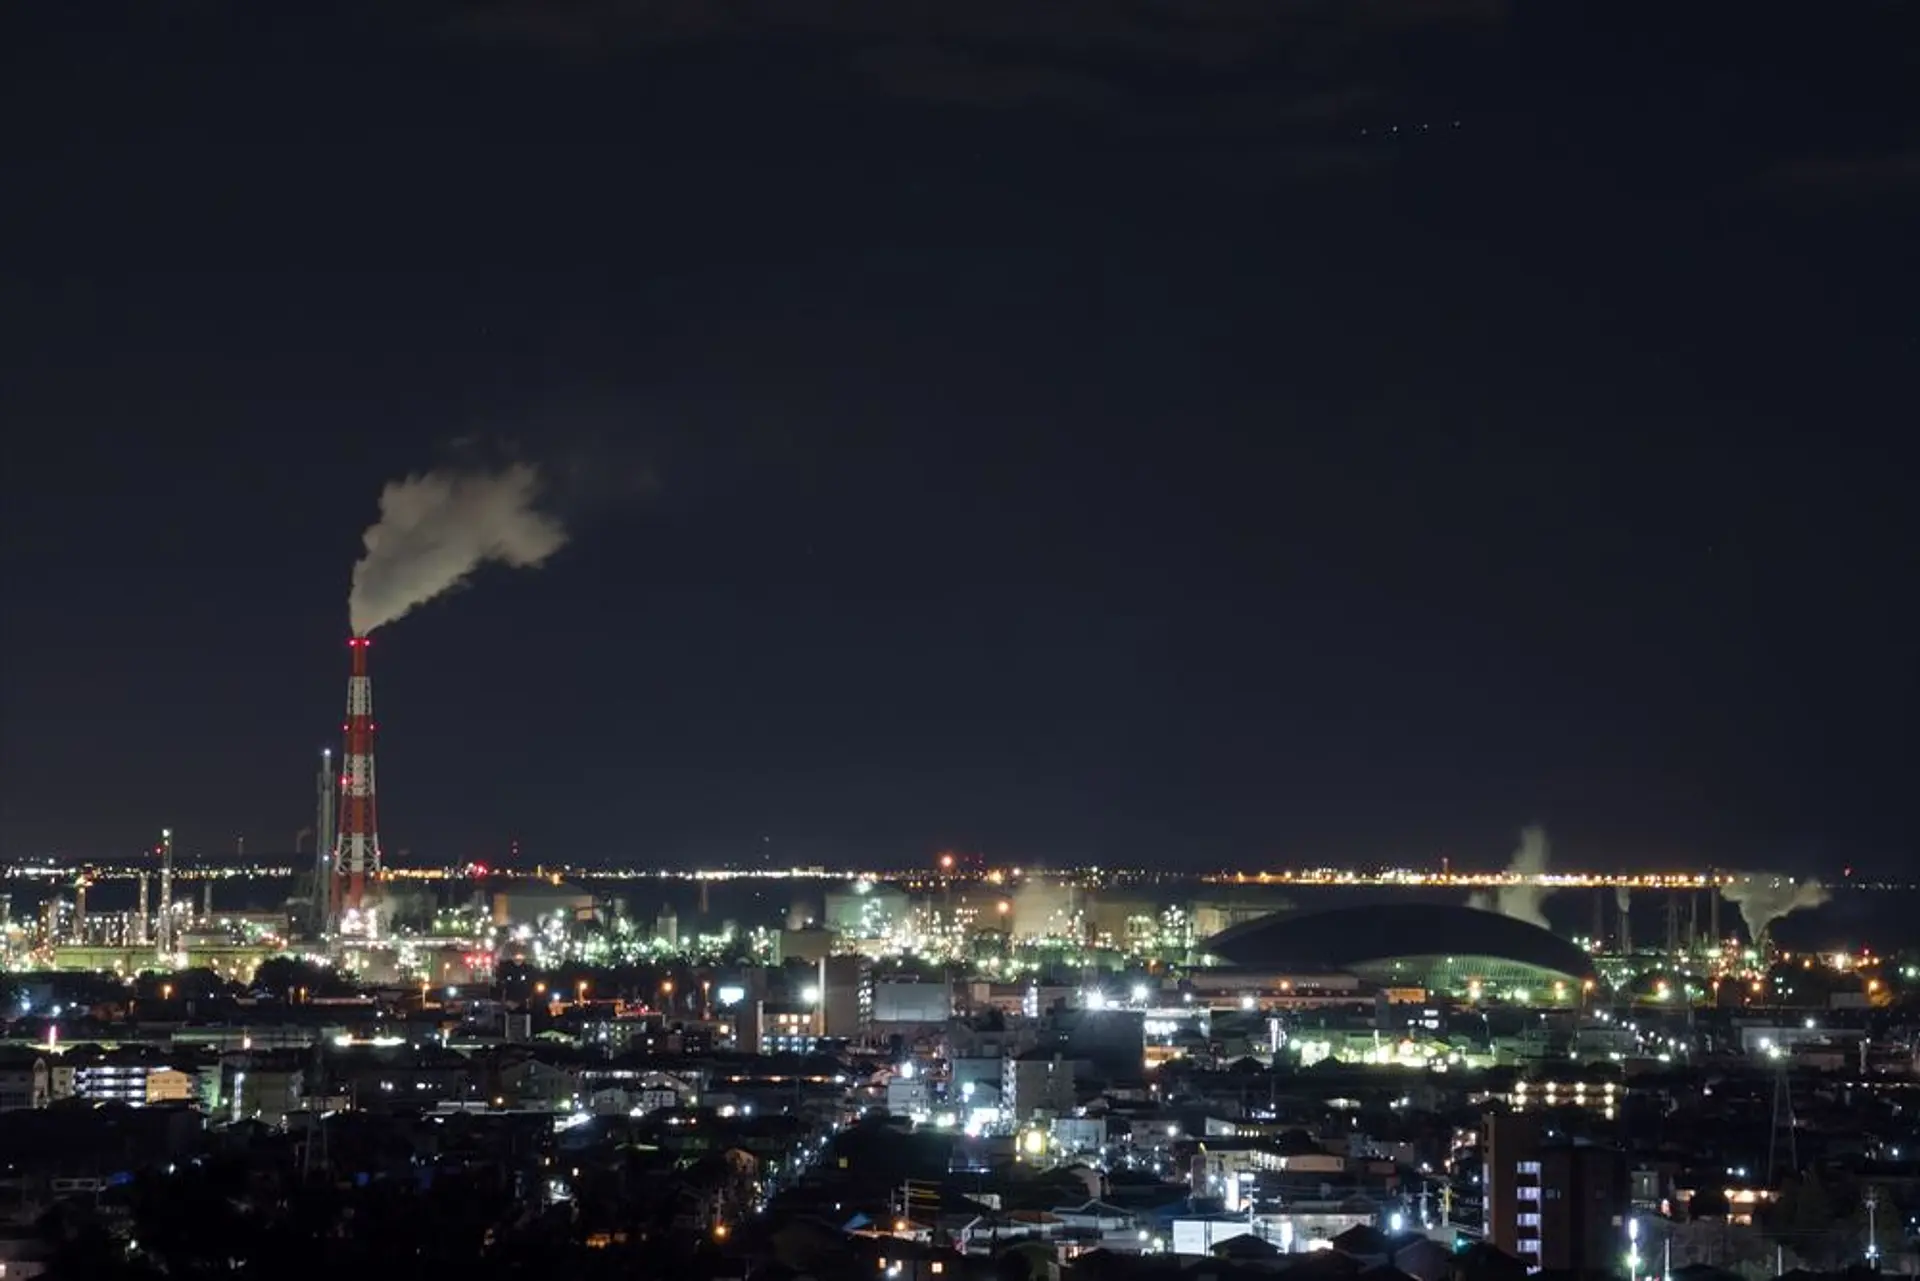
地図⑤ 塩浜地区の昭和四日市石油南からの撮影スポット。堤防から撮影すると工場全体が撮影できますので、ここからがおすすめの撮影スポットです。
車が通った際にはライトの光も一緒に撮影できますので、粘って撮影すればいい一枚が撮れるかも?河口になりますので風が通り、三脚があってもぶれやすいです。大き目で重さがある三脚を用意するのがおすすめです。写真にはありませんが、工場近くからも撮影できます。工場からの車の通行量が多いので撮影時には注意しましょう。
地図⑥ 垂坂公園からの写真。海沿いからではなく、山側からの写真となりますので今までの写真とだいぶ雰囲気が変わります。
展望台からの撮影となりますが、撮影スポットまでの道は暗いのでハンディライトを持参しましょう。
※撮影時の注意事項・コンビナート敷地内、私有地などに立ち入らないようにしましょう
・車で行く場合は、違法駐車にならないよう駐車場所に気を付けましょう
・深夜の行動は危険を伴う場合がありますので、できれば21時までに撮影をしましょう
・海沿いの撮影スポットが多いので、冬季は特に防寒対策をしてください
工場夜景撮影時の簡単な方法について
・使用カメラはデジタル一眼レフ、もしくはミラーレスカメラを使いましょう。ライブビュー(液晶で確認する撮影方法)で撮影すれば構図が簡単に決められます。
・フォーカスは明るい部分を狙って設定しましょう。暗いとオートフォーカスが合わない場合がありますので、その時はマニュアルフォーカスでピントを合わせます。
・カメラのモード設定は絞り優先(A)が簡単です。明るくしたい場合は露出を上げればOK、ただしぶれやすくなるので注意が必要。
・ISO値は100~800と設定。これ以上になるとノイズが乗りザラザラした写真になります。
・絞りはカメラにより異なりますが、F8~F11くらいに設定しましょう。
・シャッターはタイマーを使用、2秒~6秒にすれば手ぶれが起こりにくくなります。
・慣れてきたらRAWで撮影しましょう。色合いの調整や露出、彩度などの調整ができます。
今回の撮影機材NikonD750、OLYMPUS E-M5 Mark II